
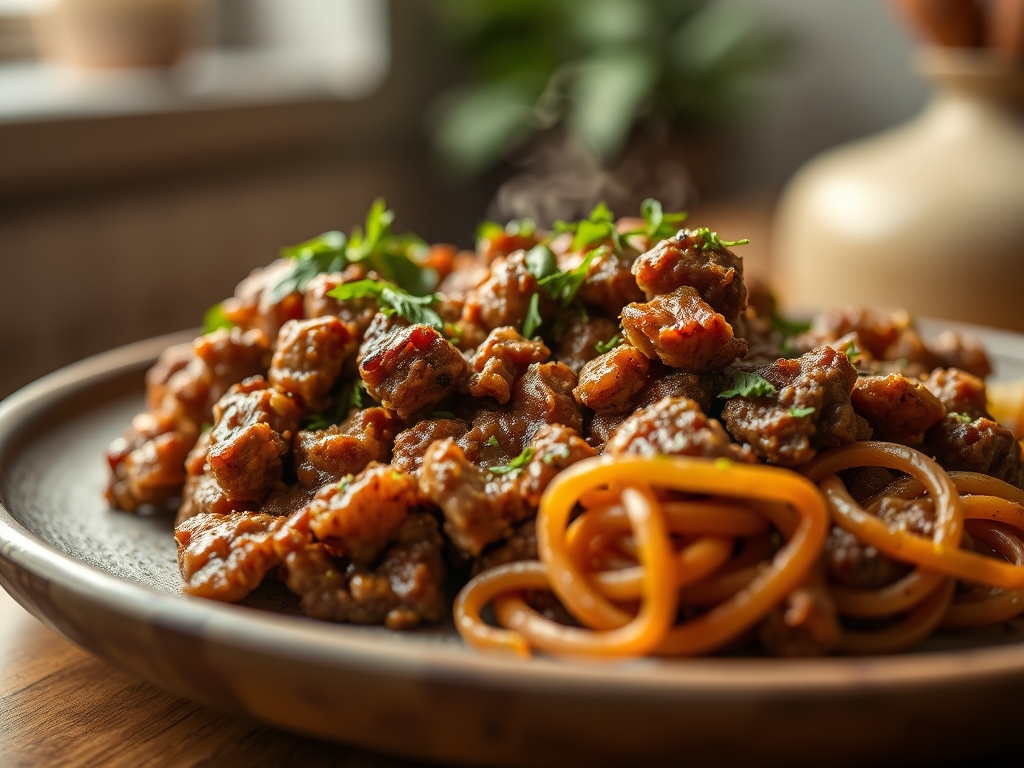
Picture the heavy-bottomed skillet heating on the burner until a faint wisp of blue smoke rises. As you drop the meat in, the Maillard reaction creates a symphony of sizzling sounds and a deep, nutty aroma that fills the kitchen. These easy keto ground beef recipes are your secret weapon for high-protein, low-carb living without sacrificing flavor.
The beauty of ground beef lies in its versatility and fat content. On a ketogenic diet, fat is not just a macro; it is a vehicle for flavor and satiety. By mastering the science of the sear, you can turn humble mince into a gourmet experience. Whether you are craving a piquant taco bowl or a viscous, creamy stroganoff, these meals rely on simple techniques that yield professional results. We are moving past basic browning and into the realm of true culinary chemistry.
Forget the dry, gray crumbles of your past. We are going to focus on moisture retention and flavor layering. By understanding how proteins denature and how fats emulsify, you will transform your weeknight routine. These six recipes are designed for the busy home cook who wants the precision of a chef with the speed of a short-order pro. Let us get your mise-en-place ready and dive into the heat.
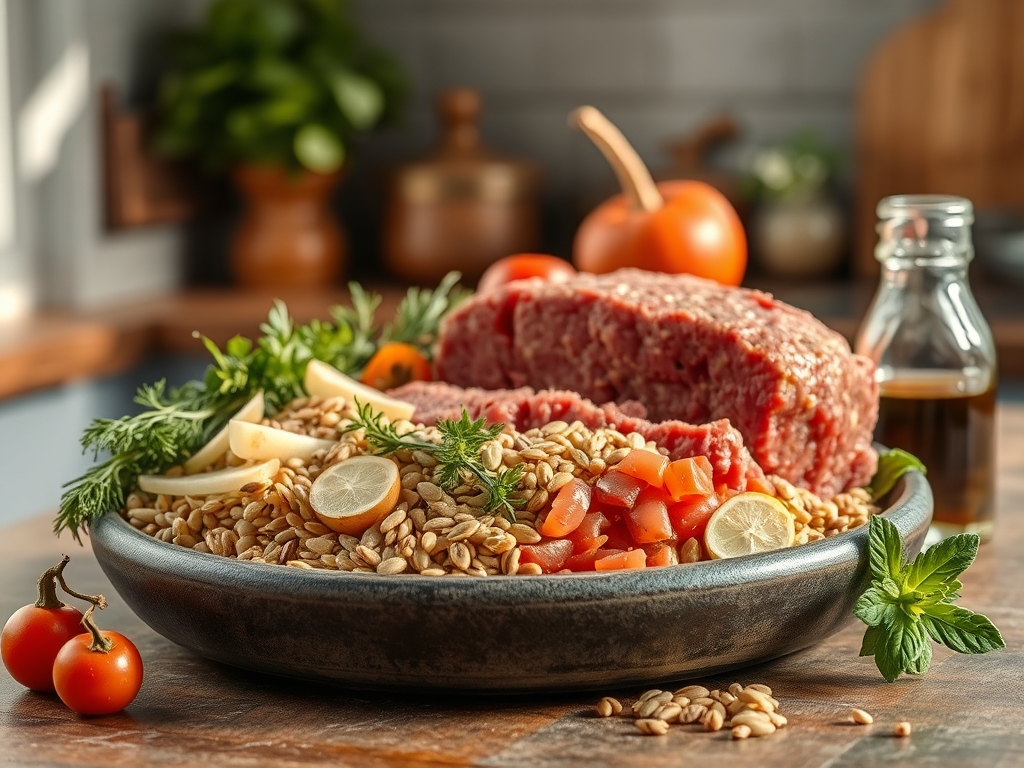
The Gathers:
To execute these easy keto ground beef recipes, your workstation must be organized. Start with high-quality 80/20 ground chuck. This specific ratio ensures enough tallow to render during cooking, providing a natural cooking medium that carries fat-soluble vitamins. You will need a microplane for grating fresh garlic and ginger into a fine paste, which increases the surface area for maximum infusion.
Your pantry should include liquid aminos or tamari for that deep umami hit without the gluten or sugar found in traditional soy sauce. For acids, keep apple cider vinegar and fresh limes on hand; acid is the "brightener" that cuts through the heavy lipids of the beef.
Smart Substitutions:
If you find the beef too heavy, you can cut it with ground pork or lamb at a 1:1 ratio to alter the fatty acid profile. Instead of cornstarch for thickening sauces, use a pinch of xanthan gum or heavy cream. These keto-friendly thickeners create a viscous mouthfeel without the glycemic spike. For crunch, swap traditional breadcrumbs for crushed pork rinds or almond flour, which provide texture while maintaining your metabolic state of ketosis.
The Clock
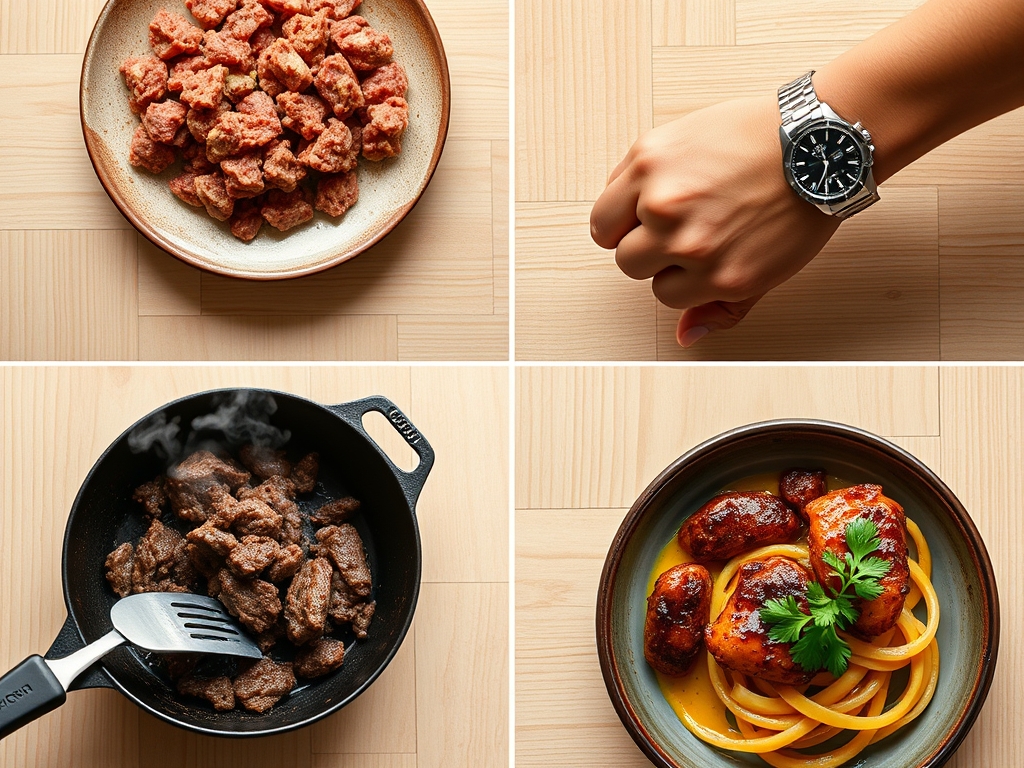
Efficiency in the kitchen is about "Chef's Flow." This is the practice of overlapping tasks so that no time is wasted. For these meals, the average prep time is 10 minutes, with a cook time of 15 to 20 minutes.
The secret to speed is the heavy-bottomed skillet. Because it retains thermal mass, the pan does not drop in temperature when the cold meat hits the surface. This prevents the beef from steaming in its own juices. While the meat is browning, use your bench scraper to clear your cutting board of chopped aromatics. By the time the meat has developed a dark crust, your vegetables are ready to be tossed in. This synchronized movement ensures you spend less than 30 minutes from fridge to table.
The Masterclass
1. The Perfect Sear
Place your skillet over medium-high heat. Do not crowd the pan. Add the beef in large chunks and let it sit undisturbed for three minutes. Use your tongs to flip the pieces once a dark brown crust has formed.
Pro Tip: This is called the Maillard reaction. It is a chemical reaction between amino acids and reducing sugars that creates hundreds of different flavor compounds. If the pan is too crowded, moisture escapes and steams the meat, preventing this browning.
2. Deglazing the Fond
Once the meat is browned and removed, you will notice brown bits stuck to the bottom of the pan. This is called "fond." Add a splash of beef bone broth or dry white wine and use a wooden spoon to scrape it up.
Pro Tip: Deglazing incorporates these concentrated flavor particles back into your sauce. This adds a complex, savory depth that cannot be replicated with salt alone.
3. Emulsifying the Sauce
Lower the heat and whisk in your fats, such as butter or heavy cream, into the deglazed liquid. Move the whisk in a circular motion to combine the water-based broth with the lipids.
Pro Tip: This creates a stable emulsion. The fats wrap around the liquid molecules, resulting in a velvety texture that coats the back of a spoon. If the heat is too high, the emulsion will "break," and the oil will separate.
4. Aerating the Aromatics
Push the meat to the edges of the pan and drop your minced garlic and spices into the center with a small amount of oil. Stir rapidly for 30 seconds until fragrant.
Pro Tip: This is known as blooming your spices. The heat releases the volatile oils within the dried herbs and spices, significantly increasing their aromatic potency before they are diluted by other liquids.
5. Managing Thermal Carryover
Remove the pan from the heat when the beef looks slightly underdone. Transfer it to a warm plate and tent it loosely with foil.
Pro Tip: Thermal carryover means the internal temperature of the meat will continue to rise by 5 to 10 degrees after being removed from the heat source. Taking it off early ensures the beef remains juicy rather than becoming rubbery.
6. The Final Fold
Just before serving, fold in fresh herbs like cilantro or parsley and a squeeze of citrus.
Pro Tip: Heat destroys the delicate enzymes and bright flavors in fresh herbs. Adding them at the very end ensures a piquant finish that balances the richness of the ground beef.
The Deep Dive
Macro Nutrition:
On average, a 6-ounce serving of these meals provides 35g of protein, 28g of fat, and 4g of net carbs. This ratio is ideal for maintaining muscle mass while staying in fat-burning mode.
Dietary Swaps:
For a Vegan twist, use a pea-protein based crumble and swap butter for avocado oil. For Gluten-Free needs, ensure your spices do not contain anti-caking agents derived from wheat.
The Fix-It:
- Too Salty: Do not add water. Add a splash of vinegar or lemon juice. The acid masks the perception of salt on the tongue.
- Greasy Sauce: Use a saucier to simmer the sauce longer, or add a teaspoon of Dijon mustard. The mustard acts as a natural emulsifier to bind the fat.
- Tough Meat: This usually means the beef was overcooked. Next time, use a digital scale to ensure even portion sizes, which leads to even cooking times.
Meal Prep Science:
When reheating, avoid the microwave if possible. The microwave excites water molecules, which can make the fat separate and the meat "pop" and dry out. Instead, reheat in a skillet with a tablespoon of water and a lid. This creates a steam chamber that restores moisture to the protein fibers.
The Wrap-Up
Mastering easy keto ground beef recipes is about more than just following a list; it is about understanding the physics of the pan. When you treat your ingredients with respect and use the right tools, you elevate a simple weeknight dinner into a culinary event. Remember to focus on that initial sear and never skip the deglazing step. Your taste buds and your macros will thank you. Now, grab your favorite skillet and start rendering!
The Kitchen Table
Can I use lean ground beef for keto?
Yes, but you must add external fats. Use olive oil or butter to ensure you hit your macro goals. Lean meat dries out faster, so reduce your cook time by two minutes to prevent a grainy texture.
Why does my ground beef turn gray?
Gray meat is a sign of steaming. This happens when the pan is not hot enough or is overcrowded. Ensure your skillet is shimmering hot and cook the beef in batches to allow moisture to evaporate quickly.
How long does cooked ground beef last?
Stored in an airtight container, cooked ground beef stays fresh for three to four days. For the best quality, cool the meat completely before sealing it to prevent condensation, which can lead to bacterial growth.
What is the best way to freeze these meals?
Freeze portions in vacuum-sealed bags to prevent freezer burn. To reheat, thaw in the refrigerator overnight. This slow thaw preserves the cellular structure of the beef, keeping it tender when you finally hit it with heat again.