
Picture this: the kitchen is filled with the scent of toasted vermicelli and sizzling fat while a heavy-bottomed skillet works its magic on the stovetop. We are elevating the humble pantry staple into something truly gourmet. Mastering rice a roni and ground beef recipes is the ultimate "smart girl" hack for a weeknight dinner that tastes like a professional bistro meal. It is about more than just convenience; it is about the chemistry of a perfectly seared protein meeting the nutty aroma of parboiled grains.
When you brown that beef, you are not just cooking meat; you are initiating the Maillard reaction. This chemical transformation creates hundreds of different flavor compounds that boxed mixes simply cannot replicate on their own. By adding fresh aromatics and controlling the moisture levels, we transform a simple box into a cohesive, luxurious meal. Whether you are craving a zesty Mediterranean twist or a deep, savory umami bomb, these upgrades turn a budget-friendly staple into a culinary centerpiece. Let us dive into the mechanics of the perfect sear and the science of the simmer.
The Gathers:
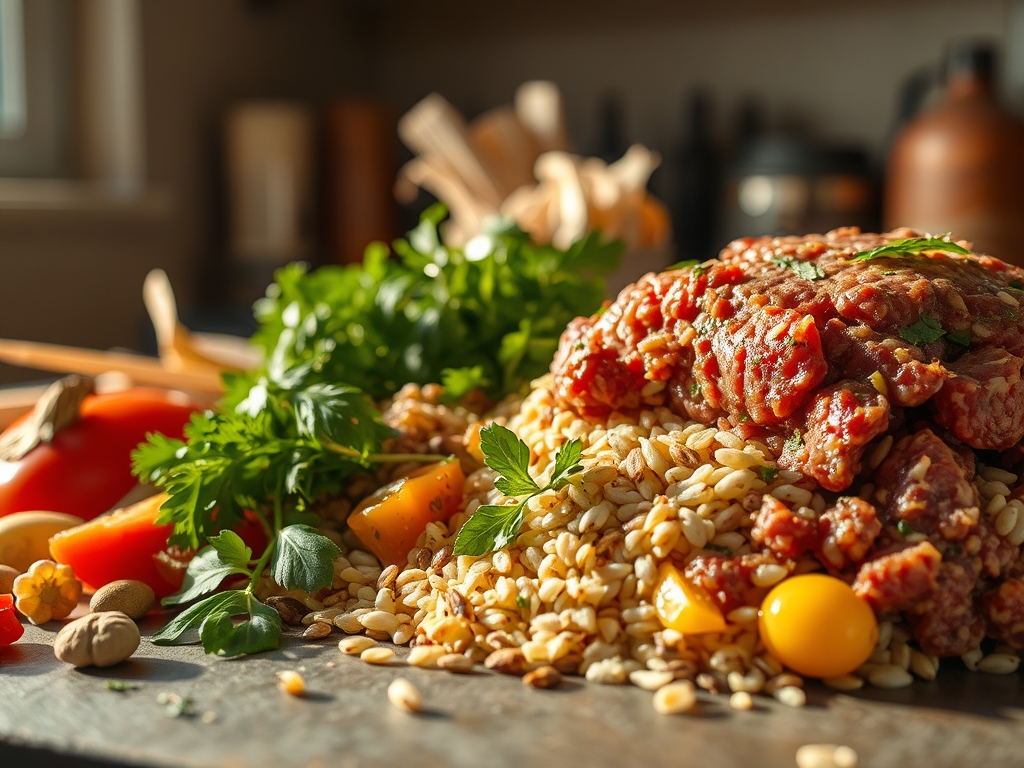
To execute these rice a roni and ground beef recipes with precision, your mise-en-place must be flawless. Start with a high-quality ground beef, preferably an 80/20 blend. This ratio ensures enough fat to render out, providing a viscous medium to toast the rice and vermicelli. You will need your box of Rice-A-Roni (Beef or Savory Butter flavors work best), plus a collection of fresh enhancers: minced garlic, shallots, and a bunch of flat-leaf parsley.
Keep a digital scale nearby to ensure your protein-to-grain ratio is balanced; usually, one pound of beef per box is the golden rule. For "Smart Substitutions," consider swapping the required water for a low-sodium bone broth to increase the protein density and depth of flavor. If you want to lighten the dish, sub in ground turkey or bison, but remember to add a tablespoon of grass-fed butter to replace the missing lipids. Use a microplane to zest a bit of lemon or grate fresh Parmesan over the final product to add a piquant brightness that cuts through the savory richness.
The Clock:
Efficiency in the kitchen is all about "Chef's Flow." You are looking at a total time of 30 minutes: 5 minutes for prep and 25 minutes for active cooking. The flow begins with your skillet. While the pan preheats, use a bench scraper to neatly organize your chopped aromatics. The beef hits the pan first because it requires the highest heat to achieve a crust.
Once the meat is browned and the fat is rendered, the rice enters the stage. This overlapping timeline ensures that the rice toasts in the beef drippings, absorbing flavor before any liquid is introduced. While the mixture simmers for the final 15 minutes, you have a "dead zone" in the clock. Use this time to whip up a quick side salad or clean your station. This ensures that by the time the timer dings, the kitchen is spotless and the meal is resting, allowing the starches to stabilize.
The Masterclass:
1. The High-Heat Sear
Place your heavy-bottomed skillet over medium-high heat until it wisps with smoke. Add the ground beef, breaking it into large chunks rather than a fine crumble. Let it sit undisturbed for three minutes to develop a deep brown crust.
Pro Tip: This is enzymatic browning at work. Moving the meat too soon causes it to steam in its own juices rather than sear; patience ensures a complex flavor profile through carbonization.
2. Degrease and Retain
Once the beef is fully browned, use a slotted spoon to remove the meat, leaving about two tablespoons of fat in the pan. If the beef was extra lean, add a pat of unsalted butter.
Pro Tip: Retaining a specific amount of fat is crucial for emulsification later. Lipids carry the flavor of the seasoning packet more effectively than water alone.
3. Toasting the Grains
Add the dry rice and pasta mix directly into the hot fat. Stir constantly with a silicone spatula until the vermicelli turns a golden brown and smells like toasted nuts.
Pro Tip: Toasting the rice creates a protective layer of dextrin. This prevents the grains from becoming mushy when the liquid is added, ensuring an "al dente" texture.
4. Deglaze and Infuse
Slowly pour in your broth or water. Use a wooden spoon to scrape the bottom of the pan, releasing the "fond" (the brown bits stuck to the bottom). Stir in the seasoning packet and the browned beef.
Pro Tip: Deglazing captures the concentrated proteins stuck to the pan. This technique, known as lifting the fond, integrates deep savory notes back into the liquid.
5. The Controlled Simmer
Bring the liquid to a rolling boil, then immediately drop the heat to low. Cover the skillet with a tight-fitting lid to trap the steam.
Pro Tip: Maintaining a low temperature prevents the exterior of the rice from disintegrating before the core is hydrated. This is the science of uniform heat distribution.
6. The Aeration Fold
Once the liquid is absorbed, turn off the heat and let the pan sit, covered, for five minutes. Use a fork to gently fluff the mixture, lifting the grains to let air circulate.
Pro Tip: This resting period allows for thermal carryover, where the residual heat finishes the cooking process gently. Aerating the rice prevents the grains from clumping together as they cool.
7. The Acid Hit
Just before serving, squeeze fresh lemon juice or add a teaspoon of apple cider vinegar. Stir in fresh herbs like cilantro or parsley.
Pro Tip: Acid acts as a flavor "brightener." It breaks through the heavy fats and salts of the boxed seasoning, creating a balanced palate.
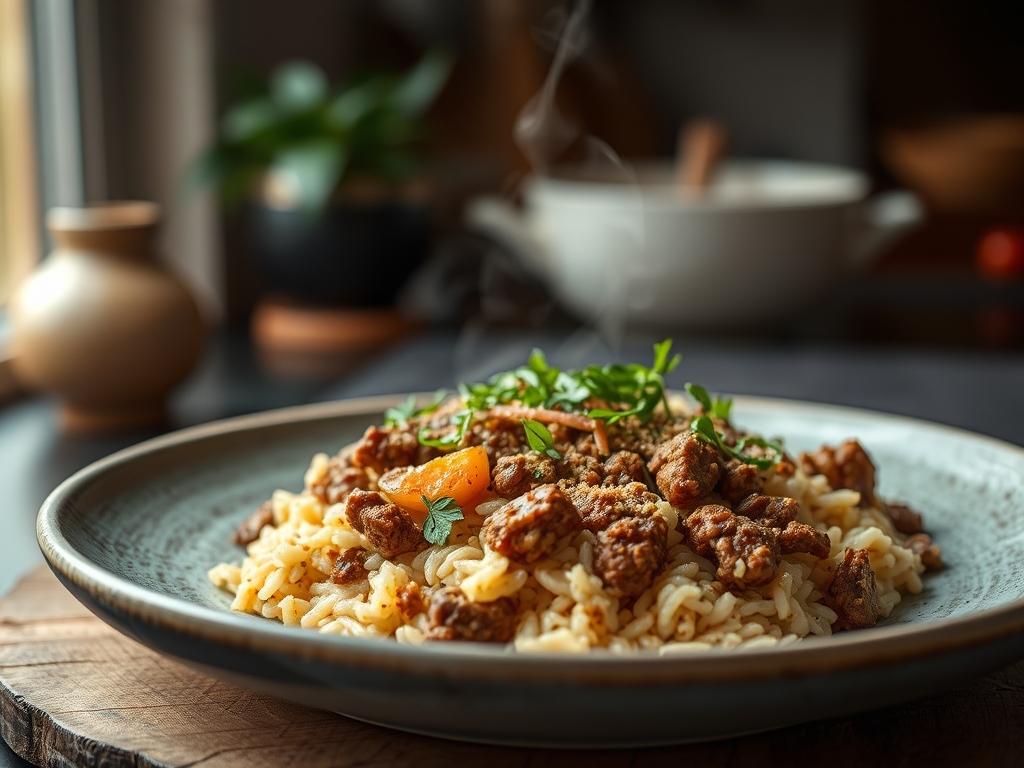
8. The Texture Garnish
Top the dish with toasted pine nuts, crispy fried onions, or a sprinkle of feta cheese for a final layer of contrast.
Pro Tip: Sensory satisfaction comes from contrasting textures. Adding a crunchy element against the soft rice triggers a more pleasurable eating experience.
The Deep Dive:
From a macro nutrition perspective, one serving provides roughly 350 to 450 calories, depending on the fat content of your beef. It is a balanced "power bowl" with roughly 25g of protein, 40g of carbohydrates, and 15g of fat. For my Keto friends, swap the rice for cauliflower rice and use only half the seasoning packet to reduce sugar. For a Vegan version, use plant-based crumbles and vegetable broth; the savory notes will still be high if you add a dash of soy sauce for umami.
"The Fix-It" is your culinary insurance policy. If your rice is too crunchy, add two tablespoons of broth and cover for three more minutes. If it is too salty, stir in a dollop of sour cream or Greek yogurt to neutralize the sodium. If the beef feels "greasy," toss in a handful of fresh spinach; the leaves will absorb the excess oil as they wilt. For meal prep, store leftovers in an airtight glass container. When reheating, add a splash of water before microwaving to create steam, which re-hydrates the starches and restores that "day-one" fluffiness.
The Wrap-Up:
There you have it; a pantry classic transformed through the power of basic chemistry and a few professional tools. These rice a roni and ground beef recipes prove that you do not need a massive grocery budget to eat like royalty. By focusing on the sear, the toast, and the rest, you have elevated a simple box into a sophisticated meal. Now, grab your fork and enjoy the fruits of your scientific labor.
The Kitchen Table:
Can I make this in one pot?
Yes. Using a single saucier or skillet is preferred. It allows the rice to cook in the rendered beef fat, which maximizes flavor and minimizes cleanup. Just ensure your lid fits tightly to trap the essential steam.
How do I prevent the rice from getting mushy?
The secret is the "toast." Ensure the dry grains are well-coated in fat and toasted until golden before adding liquid. This creates a starch barrier that maintains the structural integrity of each individual grain during the simmer.
What is the best beef-to-rice ratio?
A standard 6.8-ounce box of Rice-A-Roni pairs perfectly with one pound of ground beef. This ensures every forkful has an equal distribution of protein and grains, providing a satisfying, high-density meal that feels substantial.
Can I add vegetables to the mix?
Absolutely. Small-diced bell peppers, peas, or shredded carrots should be added during the last five minutes of simmering. This preserves their color and "snap" without making the entire dish watery or overcooked.