
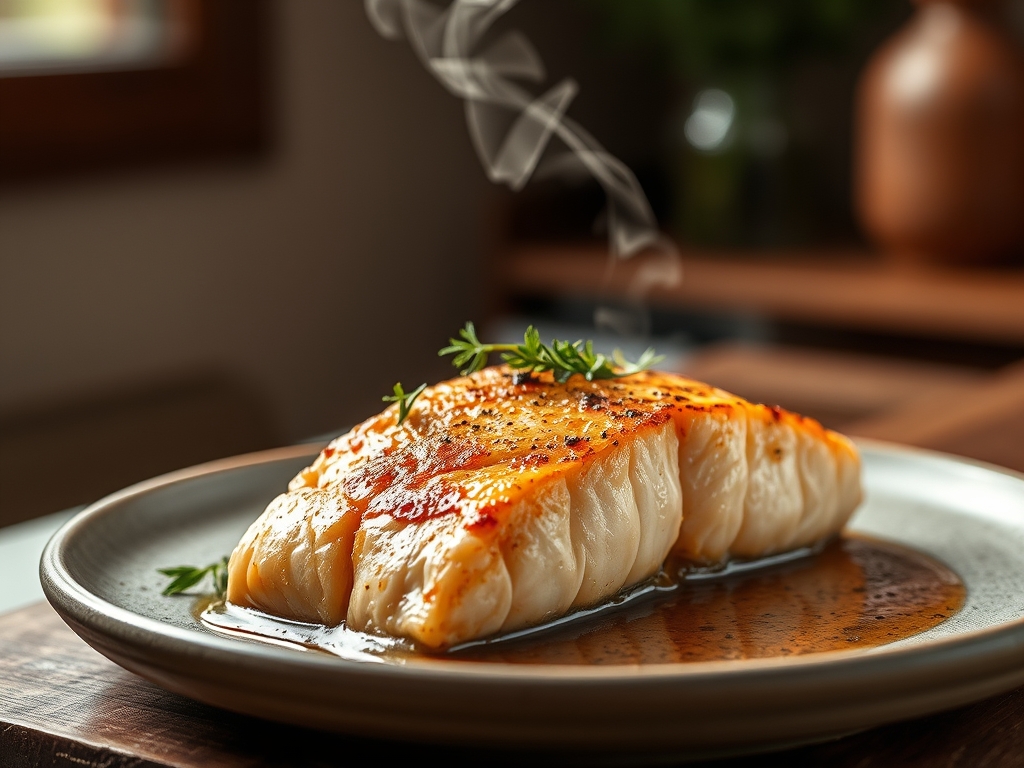
Picture a slab of Atlantic salmon so tender that the mere weight of a fork causes it to shatter into translucent, buttery petals. This is the gold standard of the best salmon recipes baked in a home kitchen. We have all been there; staring at a sad, chalky piece of fish that looks more like a pencil eraser than a gourmet meal. The difference between a rubbery disaster and a restaurant-quality masterpiece lies entirely in the molecular management of proteins and fats. When you master the delicate dance of heat and moisture, you transform a simple fillet into a luxurious experience. We are going to dive deep into the chemistry of the oven to ensure your dinner is never dry again. This guide is your backstage pass to culinary perfection, blending hard science with that effortless kitchen swagger you have always wanted.
The Gathers:
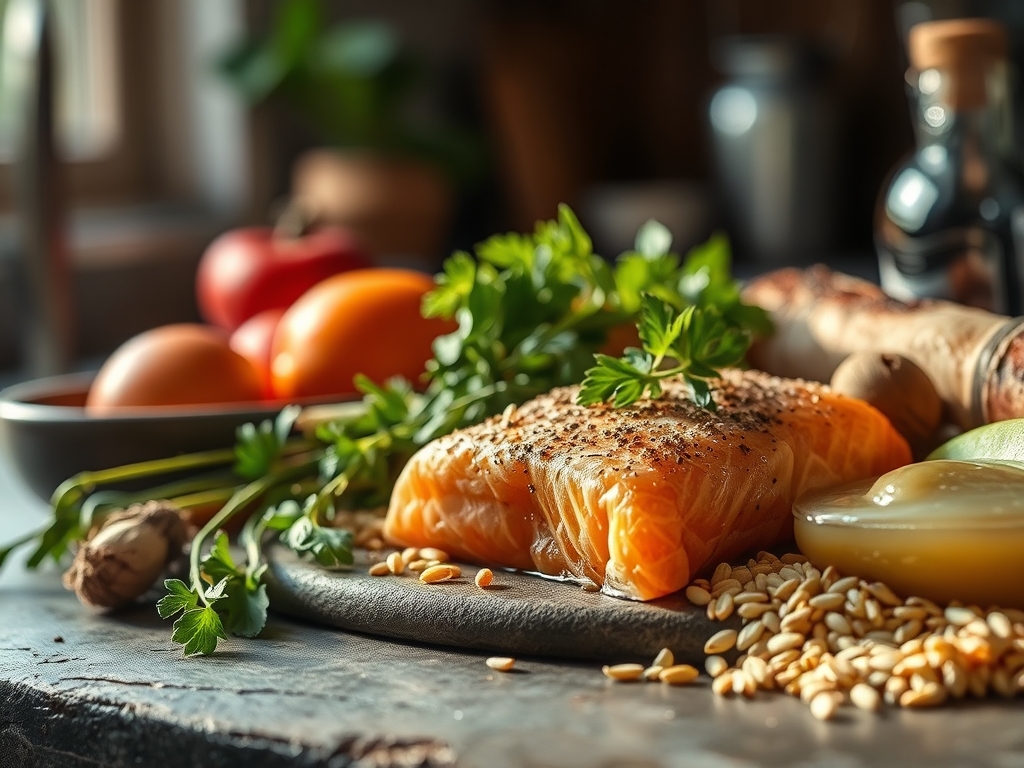
Before we even think about preheating, we must assemble our mise-en-place with the precision of a laboratory technician. Your main subject should be a center-cut fillet, ideally skin-on to provide a thermal buffer. You will need high-quality fats; think grass-fed butter for its viscous mouthfeel or a cold-pressed olive oil. For aromatics, gather fresh dill, flat-leaf parsley, and several cloves of garlic. You will also need a microplane to zest a bright, organic lemon, ensuring you capture the essential oils without the bitter white pith.
Smart Substitutions:
If you are avoiding dairy, a high-quality avocado oil provides a similar smoke point and fat density to butter. For those looking to swap the citrus, a splash of verjuice or a mild white balsamic vinegar can provide that necessary piquant acidity to cut through the fatty acids of the fish. If fresh herbs are unavailable, use one-third the amount of dried herbs, but crush them in your palm first to infuse the oils back into the dish.
The Clock
Efficiency in the kitchen is about the Chef's Flow. Total preparation time should take no more than 10 minutes, while the actual roasting period spans 12 to 15 minutes depending on the thickness of the cut. However, the most critical time block is the 5-minute rest period after the fish leaves the oven. This allows for thermal carryover, where the internal temperature rises slightly while the muscle fibers relax, locking in the juices. Total time from fridge to table is approximately 30 minutes; a perfect window for a weeknight win.

The Masterclass
1. Tempering the Protein
Take your salmon out of the refrigerator at least 20 minutes before cooking. Cold fish hitting a hot pan or oven causes the muscle fibers to contract violently, squeezing out moisture and resulting in a tough texture. By bringing the fish closer to room temperature, you ensure even heat distribution.
Pro Tip: This process prevents the "white stuff" known as albumin from leaking out. Albumin is a protein that solidifies when the fish is cooked too fast or too cold; tempering keeps it inside the flakes where it belongs.
2. The Desiccation Ritual
Use a paper towel to pat the salmon bone-dry. Any surface moisture will turn to steam in the oven, effectively boiling the fish instead of roasting it. Use your bench scraper to clear any excess scales from the skin side before seasoning generously with kosher salt from a high altitude to ensure even coverage.
Pro Tip: Salt acts as a denaturant, breaking down tightly wound proteins so they can hold onto more water during the cooking process. This results in a much juicier finish.
3. The Emulsified Herb Bath
In a small saucier, melt your butter over low heat. Whisk in your minced garlic, lemon zest, and herbs. You are creating a temporary emulsion that will coat the fish in a protective, flavorful layer. Use a pastry brush to apply this mixture liberally over the flesh side of the salmon.
Pro Tip: Fat is a flavor carrier. The volatile compounds in the garlic and herbs are fat-soluble, meaning they need the butter to effectively infuse the deep tissues of the salmon.
4. Precision Roasting
Place the salmon on a parchment-lined heavy-bottomed baking sheet. Position it in the center of the oven at 400 degrees Fahrenheit. This temperature is high enough to trigger the Maillard reaction on the surface while keeping the interior succulent.
Pro Tip: Using a heavy-bottomed pan provides thermal mass, which prevents the oven temperature from dropping when you open the door, ensuring a consistent cook.
5. The Internal Metric
Forget the "flaking with a fork" test; it is too late by then. Use a digital scale or, more accurately, a digital probe thermometer. Remove the salmon when it hits 125 degrees Fahrenheit for a perfect medium-rare to medium finish.
Pro Tip: This accounts for thermal carryover. The residual heat will continue to cook the fish for several minutes after it is removed, bringing the final temp to an ideal 130-135 degrees.
6. The Final Aeration
Once out of the oven, use tongs to carefully transfer the salmon to a warm platter. Squeeze a fresh wedge of lemon over the top to aerate the heavy fats with a burst of bright acidity. Let it sit, undisturbed, for five minutes.
Pro Tip: Resting allows the internal pressure to equalize. If you cut into it immediately, the pressurized juices will flee onto the plate, leaving the meat dry.
The Deep Dive
Macro Nutrition: Salmon is a nutritional powerhouse, offering roughly 20 grams of protein and 13 grams of healthy fats per 4-ounce serving. It is rich in Omega-3 fatty acids, which are essential for brain health and reducing inflammation.
Dietary Swaps:
- Keto: This recipe is naturally keto-friendly. Increase the butter for higher fat macros.
- Vegan: Swap the salmon for a thick "steak" of cauliflower or firm tofu, using vegan butter and a dash of liquid smoke.
- GF: This method is naturally gluten-free; just ensure your spices are certified.
The Fix-It:
- Issue: Fish is sticking to the pan. Fix: Ensure the pan is preheated or use parchment paper. Never skip the oil on the skin.
- Issue: White gunk (albumin) everywhere. Fix: Lower your oven temp or take the fish out 2 minutes earlier. It is overcooked.
- Issue: Skin is soggy. Fix: Start the salmon skin-side down in a heavy-bottomed skillet on the stove for 2 minutes before moving to the oven.
Meal Prep & Reheating: To maintain "day-one" quality, reheat salmon in a 275-degree oven with a splash of water covered in foil. This creates a gentle steam environment that prevents the fats from turning rancid or the proteins from becoming rubbery.
The Wrap-Up
Mastering the best salmon recipes baked is about respecting the biological makeup of the fish. By controlling the temperature, managing moisture, and understanding the chemistry of fats, you move from a casual cook to a culinary authority. Your kitchen is your lab; treat every fillet with the precision it deserves and you will be rewarded with the flakiest, most flavorful results of your life. Now, grab those tools and get roasting!
The Kitchen Table
How do I know when salmon is done without a thermometer?
The flesh will change from translucent to opaque pink. When pressed gently with a finger, the layers should begin to separate or "flake" slightly, but still feel somewhat firm and springy to the touch.
Should I bake salmon covered or uncovered?
Bake it uncovered for a roasted texture and better flavor development. Covering it traps steam, which poaches the fish. Only cover it if you are using a "papillote" method with parchment to intentionally steam the fillets.
Can I bake salmon from frozen?
It is possible but not recommended for the best texture. If you must, rinse off any ice crystals, pat dry, and increase the bake time by 50 percent. For the flakiest results, always thaw overnight in the refrigerator.
Why is my salmon dry even if it looks pink?
You likely missed the window for thermal carryover. Even if it looks pink, if the internal temperature exceeds 145 degrees, the protein fibers tighten and squeeze out all the moisture. Always pull it early and let it rest.