
Listen to that sound. It is the distinct, percussive crackle of a perfectly dehydrated starch shell shattering under your teeth. If you are tired of soggy, limp spuds, mastering fingerling potato recipes air fryer style is your new culinary obsession. These elongated, heirloom tubers are not just miniature versions of Russets; they possess a dense, waxy parenchyma cell structure that holds its shape under high heat. While a standard oven struggles to circulate air around these curved beauties, the concentrated convection of an air fryer transforms them into golden, glass-like treasures. We are moving beyond basic roasting into a realm where high-velocity air meets molecular gastronomy. By the end of this session, you will understand exactly how to manipulate surface moisture and lipid distribution to achieve a crunch that rivals deep frying without the heavy oil saturation. Grab your apron because we are about to turn these humble earth gems into a sophisticated, high-texture masterpiece that will make your convection oven feel obsolete.

The Gathers:
Before we engage the heating elements, your mise-en-place must be precise. You will need two pounds of fresh fingerling potatoes; look for varieties like Russian Banana or French Fingerling for their buttery yellow flesh. For the lipid component, select a high-smoke point fat like avocado oil or clarified butter (ghee) to avoid acrolein production at high temperatures. You will also need kosher salt for its jagged crystal structure that adheres to the skin, and a high-quality herb blend such as rosemary and thyme.
Smart Substitutions: If you are out of avocado oil, refined coconut oil works beautifully to provide a subtle sweetness. For a vegan "parmesan" crust, nutritional yeast offers a piquant, nutty profile that mimics the savory depth of aged cheese. If fingerlings are unavailable, small Cippolini onions or halved baby Yukon Golds can substitute, though the cook times will vary slightly due to different sugar concentrations. Always use a digital scale to ensure your potato-to-oil ratio remains consistent for optimal heat transfer.
The Clock:
Efficiency in the kitchen is about "Chef's Flow," the art of overlapping tasks to minimize downtime. Your total preparation time is ten minutes, while the active cooking phase takes approximately eighteen to twenty-two minutes.
The Prep (0-10 min): Scrub, dry, and slice. This is where you use a bench scraper to clear your board quickly.
The Roast (10-25 min): The first phase of cooking focuses on internal softening.
The Crisp (25-32 min): The final blast of heat where the Maillard reaction accelerates.
The Rest (32-35 min): Crucial for moisture redistribution.
By utilizing a digital timer, you can prep a dipping sauce or a side protein while the air fryer does the heavy lifting. Never crowd the basket; air must circulate 360 degrees to prevent steaming.
The Masterclass:
1. The Thermal Prep and Scrub
Begin by preheating your air fryer to 400 degrees Fahrenheit. While it reaches temperature, scrub your potatoes in cold water. Use a clean kitchen towel to dry them until they are bone-dry to the touch.
Pro Tip: Surface moisture is the enemy of the crunch. Removing water prevents the formation of a steam barrier, allowing the Maillard reaction to begin immediately upon contact with the hot air.
2. The Precision Slice
Using a sharp chef knife, slice the fingerlings lengthwise. This increases the surface area-to-volume ratio, ensuring more "crunch real estate" per bite.
Pro Tip: Slicing the potatoes exposes the internal starch granules. This allows the lipids to penetrate the surface layer, creating a more viscous and flavorful interior while the exterior hardens.
3. The Lipid Emulsification
In a large stainless steel bowl, toss the potatoes with two tablespoons of oil. Use your hands to ensure every nook and cranny is coated. Add your salt and spices now.
Pro Tip: Oil acts as a thermal conductor. A thin, even layer ensures that heat is transferred uniformly across the uneven surface of the potato, preventing localized burning.
4. The First Blast
Arrange the potatoes in the air fryer basket in a single layer, cut-side down. Cook at 400 degrees for 12 minutes.
Pro Tip: Placing the cut side down utilizes conduction from the hot basket tray. This jumpstarts the browning of the exposed starch before the skin begins to blister.
5. The Aeration Shake
At the 12-minute mark, use tongs to vigorously shake the basket. This redistributes the potatoes and ensures that the air reaches the parts that were previously shielded.
Pro Tip: Shaking the basket prevents enzymatic browning from turning into carbonization. It also knocks off any excess moisture that may have pooled in the corners of the fryer.
6. The Herb Infusion
Add your fresh woody herbs (rosemary or thyme) during the last 4 minutes of cooking.
Pro Tip: Adding herbs too early causes them to incinerate. Adding them late allows the volatile oils in the herbs to infuse into the hot fat on the potato surface without losing their aromatic profile.
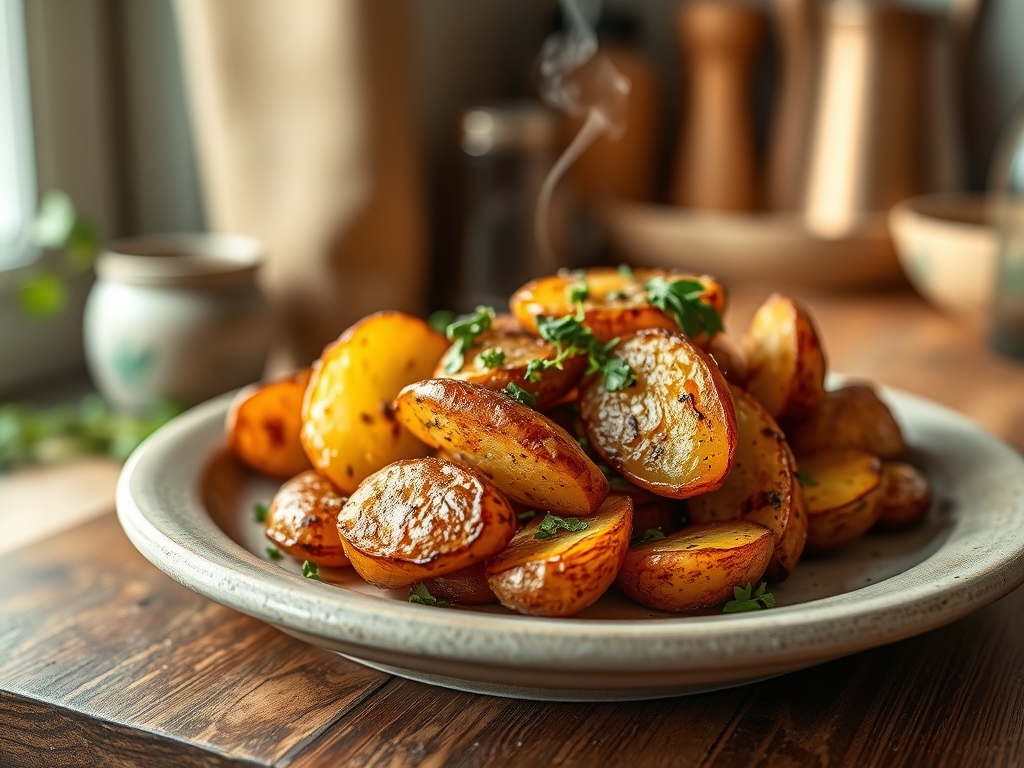
7. The Microplane Finish
Once the potatoes are deep golden brown, remove them and immediately zest a clove of garlic or some parmesan cheese over them using a microplane.
Pro Tip: The thermal carryover (the heat remaining in the potato after it leaves the fryer) is just enough to mellow the raw garlic bite and melt the cheese without burning it.
8. The Texture Check
Give the basket one last toss. The potatoes should sound like marbles hitting each other; a hollow, light "clink" indicates a successful dehydration of the crust.
Pro Tip: If the potatoes feel soft, they need two more minutes. This final stage is where the starch retrogradation begins, setting the structure of the crust.
9. The Resting Phase
Transfer the potatoes to a wire rack for two minutes before serving.
Pro Tip: Resting on a rack allows air to circulate underneath, preventing the bottom from becoming soggy due to trapped steam. This ensures a "day-one" crunch in every single bite.
The Deep Dive:
From a nutritional standpoint, fingerling potatoes are a powerhouse of complex carbohydrates and potassium. One serving provides roughly 130 calories, 3 grams of fiber, and zero cholesterol. To keep this Keto-friendly, you can swap half the potatoes for cauliflower florets, though the texture will be softer. For a Vegan version, ensure your lipid choice is plant-based and use smoked paprika for a meaty depth of flavor.
The Fix-It:
- Soggy Centers: You likely overcrowded the basket. Cook in smaller batches to allow for proper airflow.
- Burnt Skins: Your oil has a low smoke point. Switch to avocado oil or ghee for high-heat stability.
- Bland Flavor: You salted after cooking. Salt the raw, oiled potatoes so the seasoning bonds to the starch during the heating process.
Meal Prep: To reheat, never use a microwave. Place the leftovers back in the air fryer at 375 degrees for 3 to 4 minutes. This re-activates the fats and recrisps the skin, maintaining that original texture.
The Wrap-Up:
Mastering fingerling potato recipes air fryer style is a gateway to culinary confidence. You have learned how to manipulate starch, manage thermal conductivity, and use professional tools like the bench scraper and microplane to elevate a simple side dish. These potatoes are not just food; they are a textural experience that balances a creamy, velvet-like interior with a defiant, salty crunch. Now, go forth and conquer your kitchen with the science of the spud!
The Kitchen Table:
Why are my air fryer fingerling potatoes not crispy?
The most common culprit is residual surface moisture or overcrowding the basket. Ensure potatoes are bone-dry before oiling and leave ample space between each piece so the high-velocity air can effectively dehydrate the starch into a crisp crust.
Do I need to soak fingerling potatoes before air frying?
Soaking is not strictly necessary for fingerlings because they have lower starch levels than Russets. However, a 15-minute cold water soak can remove excess surface starch, resulting in an even shatter-crisp exterior if you have the extra time.
What is the best temperature for air frying fingerlings?
The "Golden Zone" is 400 degrees Fahrenheit. This temperature is high enough to trigger the Maillard reaction and evaporate moisture rapidly without burning the natural sugars in the potato before the interior is fully softened and creamy.
Can I use frozen fingerling potatoes in the air fryer?
Yes, but do not thaw them first. Thawing creates a mushy texture. Place frozen potatoes directly into the preheated air fryer and add 5 to 7 minutes to the cooking time to account for the internal ice crystals.