
Imagine the scent of star anise and toasted sesame oil drifting through your hallway before you even turn the doorknob. There is a specific kind of magic in returning home to a kitchen that has been working harder than you have. When you master chinese beef recipes slow cooker style; you are not just making dinner; you are conducting a low and slow symphony of collagen breakdown and aromatic infusion. We are talking about beef so tender it practically sighs when your fork touches it; swaddled in sauces that have reduced into a glossy; lip-smacking lacquer. This is the intersection of ancient flavor profiles and modern convenience. By the time we are done; you will understand exactly why that ceramic crock is the secret weapon for achieving authentic texture. We are diving deep into nine classic variations; from the citrus zing of Orange Beef to the deep; umami-rich soul of a traditional Red Braise. Grab your favorite apron; because we are about to turn your kitchen into the best bistro in the neighborhood.
The Gathers:
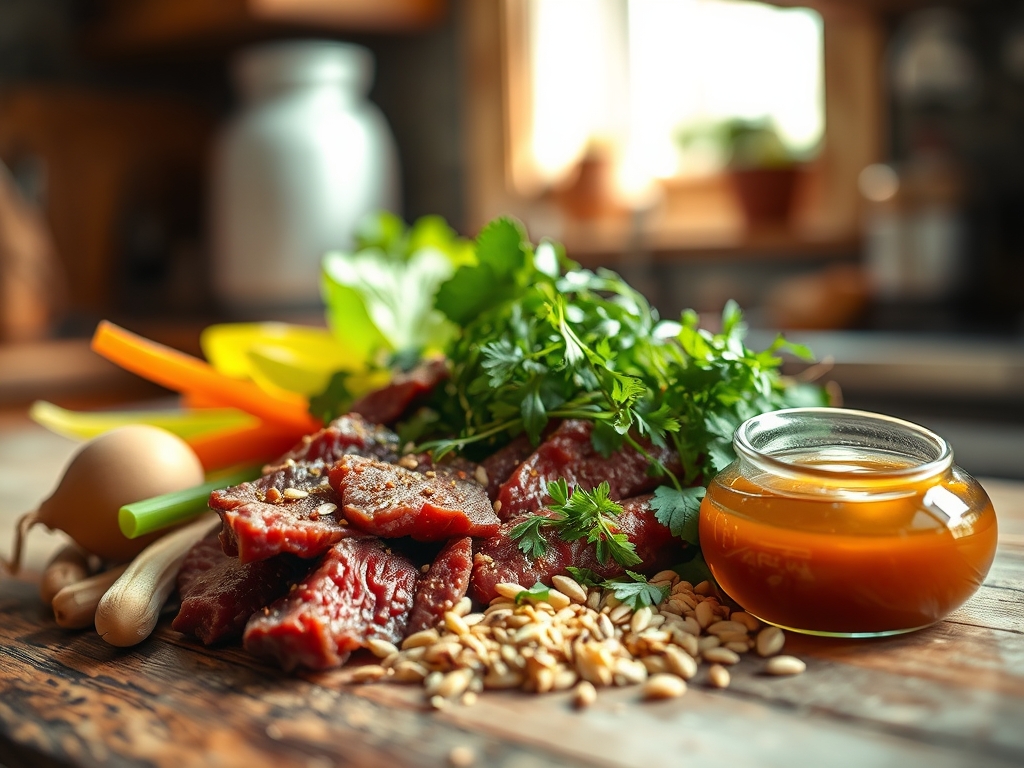
To achieve restaurant-quality results; your mise-en-place must be precise. Start with the protein. You want cuts with significant connective tissue; such as chuck roast or beef shank. As these cook; the collagen transforms into gelatin; creating that luxurious; viscous mouthfeel that lean cuts simply cannot provide. Use a digital scale to ensure your ratios are exact. You will need a high-quality soy sauce (both light for salt and dark for color); toasted sesame oil; and a bottle of Shaoxing rice wine to provide that essential fermented funk.
For the aromatics; reach for your microplane to zest fresh ginger and garlic into a fine paste. This increases the surface area; allowing the essential oils to infuse the braising liquid more efficiently. You will also need rock sugar for a mellow sweetness; or you can substitute with honey or brown sugar if needed. If you are watching your sodium; coconut aminos are a fantastic smart substitution that maintains a similar savory profile. Do not forget the star anise and Sichuan peppercorns; which provide the numbing sensation known as ma-la. Having everything measured out in small glass bowls before you turn on the heat ensures a seamless transition from prep to pot.
The Clock:
The "Chef's Flow" is all about front-loading your effort. Expect to spend about 20 to 30 minutes on active preparation. This includes trimming the silver skin from the beef and searing the exterior to trigger the Maillard reaction. Once the lid is closed; the slow cooker takes over for a marathon session of 6 to 8 hours on the low setting.
Cooking on high for 4 hours is an option; but for the most delicate fiber separation; the low and slow approach is superior. It allows the heat to penetrate the center of the meat without toughening the outer proteins. This timeframe is perfect for a standard workday. You prep in the morning; and by the time you are ready for a glass of wine in the evening; the beef has reached its peak structural integrity.
The Masterclass:
1. The Sear and Deglaze
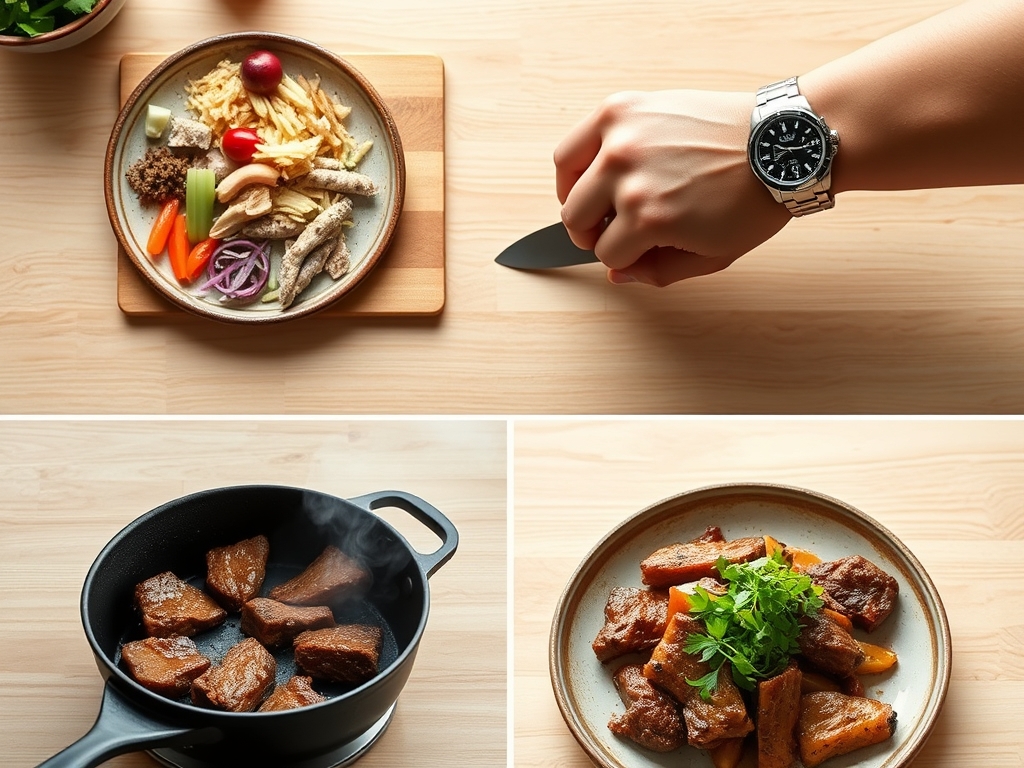
Before the beef ever sees the slow cooker; use a heavy-bottomed skillet to brown the meat in small batches. Once a dark crust forms; remove the beef and use a splash of rice wine to deglaze the pan; scraping up the fond (those flavorful brown bits) with a wooden spoon.
Pro Tip: This step utilizes thermal carryover. The high initial heat creates complex flavor compounds that a slow cooker cannot replicate due to its moisture-heavy environment.
2. The Aromatic Bloom
Add your ginger; garlic; and scallion whites to the skillet for exactly sixty seconds until they become fragrant. This process; known as tempering; allows the fat-soluble flavor molecules in the spices to dissolve into the oil.
Pro Tip: Sautéing aromatics before slow cooking prevents them from tasting "raw" or "tinny" after several hours of simmering.
3. The Liquid Ratio
Transfer the beef and aromatics into the ceramic insert. Pour in your prepared sauce mixture; ensuring the meat is at least two-thirds submerged. Use a saucier to mix your liquids beforehand for a perfectly homogenized braising base.
Pro Tip: Do not overfill. A slow cooker creates its own moisture through condensation; so a concentrated sauce will result in a more intense final glaze.
4. The Long Simmer
Set your device to low. This is where the enzymatic browning continues at a microscopic level while the tough muscle fibers relax. Resist the urge to lift the lid; as this releases steam and can add 20 minutes to your cook time per peek.
Pro Tip: Maintaining a consistent internal temperature of roughly 190 to 200 degrees Fahrenheit is the sweet spot for breaking down tough connective tissue without drying out the meat.
5. The Final Reduction
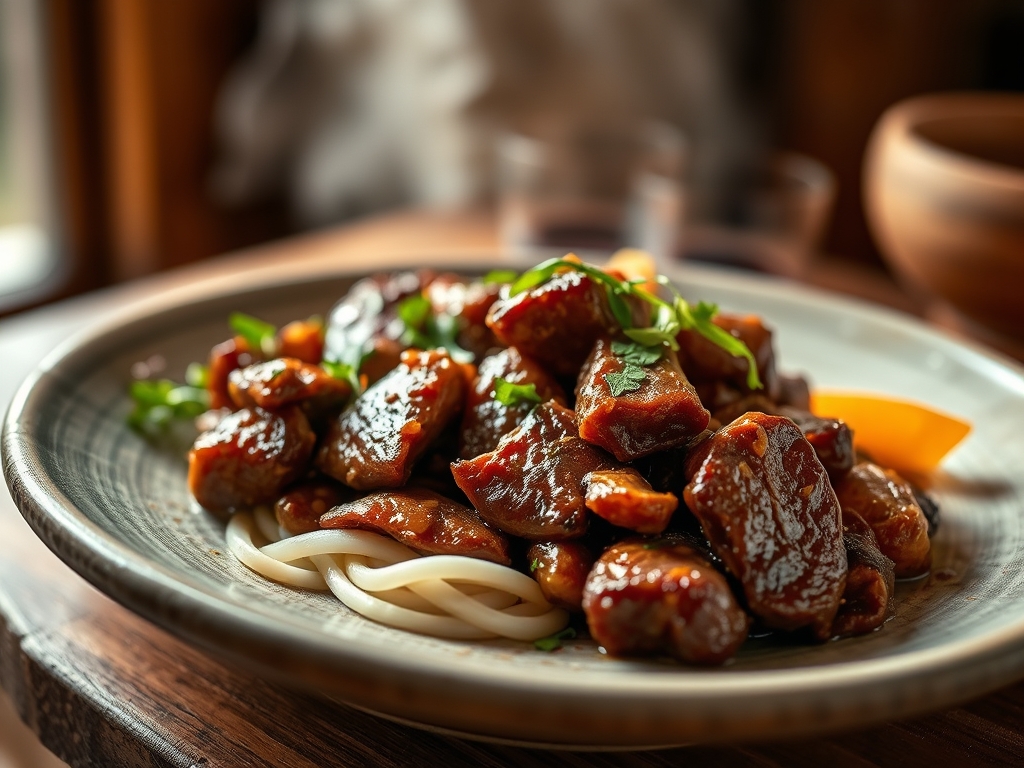
Once the beef is tender; use tongs to remove it. Pour the remaining liquid into a small pot and whisk in a cornstarch slurry. Boil until the sauce becomes napé; meaning it is thick enough to coat the back of a spoon.
Pro Tip: This step is crucial for "cling." Without reduction; the sauce will be watery and fail to adhere to the beef and vegetables.
The Deep Dive:
Macro Nutrition: Chinese beef recipes slow cooker style are high in protein and essential minerals like zinc and B12. While the sodium can be high due to soy sauce; you can balance this by serving over cauliflower rice or steamed bok choy. A standard serving typically ranges from 350 to 500 calories depending on the sugar content of the glaze.
Dietary Swaps: For a Keto-friendly version; swap the rock sugar for erythritol and use xanthan gum instead of cornstarch for thickening. To make it Gluten-Free; ensure you are using Tamari instead of traditional soy sauce. For a vegan "beef" alternative; use large chunks of king oyster mushrooms; though you should reduce the cook time to 3 hours to avoid mushiness.
The Fix-It:
- Too Salty: Add a peeled potato to the pot for the last hour to absorb excess salt; or balance with a teaspoon of rice vinegar.
- Too Thin: If the sauce is watery; ensure you are using a cornstarch slurry (equal parts cold water and starch) and bringing it to a full boil.
- Tough Meat: This usually means it hasn't cooked long enough. Give it another hour; the collagen needs time to fully melt.
Meal Prep: These dishes actually taste better on day two because the flavors continue to equilibrate in the fridge. When reheating; use a splash of beef broth to loosen the sauce. Avoid the microwave if possible; a gentle warm-up in a skillet preserves the texture of the gelatinous sauce.
The Wrap-Up:
Mastering chinese beef recipes slow cooker techniques is a total game changer for your weekly rotation. You get all the depth of a professional kitchen with the ease of a one-pot meal. Whether you are craving the spicy kick of Mongolian beef or the comforting warmth of a soy-braised brisket; these methods ensure a perfect result every single time. So; clear some counter space; get those aromatics sizzling; and let the slow cooker do the heavy lifting. Your future self will thank you when that first melt-in-your-mouth bite hits.
The Kitchen Table:
What is the best cut of beef for slow cooking?
Chuck roast or beef shank are ideal. These cuts contain high amounts of collagen; which breaks down into gelatin during the long; moist-heat cooking process. This results in incredibly tender meat and a rich; viscous sauce that leaner cuts cannot provide.
Can I put raw beef directly into the slow cooker?
Yes; but you shouldn't. Searing the beef first in a heavy-bottomed skillet creates a Maillard reaction. This develops complex flavors and a deep color that the slow cooker's gentle heat simply cannot achieve on its own.
How do I thicken the sauce in a slow cooker?
Whisk together equal parts cornstarch and cold water to create a slurry. Stir this into the hot liquid during the last 30 minutes of cooking; or reduce the sauce on the stovetop for a more concentrated; glossy finish.
Why is my slow cooker beef still tough?
It likely needs more time. Connective tissue requires a specific temperature and duration to transform into gelatin. If the meat is still rubbery; simmer it for an additional hour on the low setting until it flakes apart easily with a fork.