
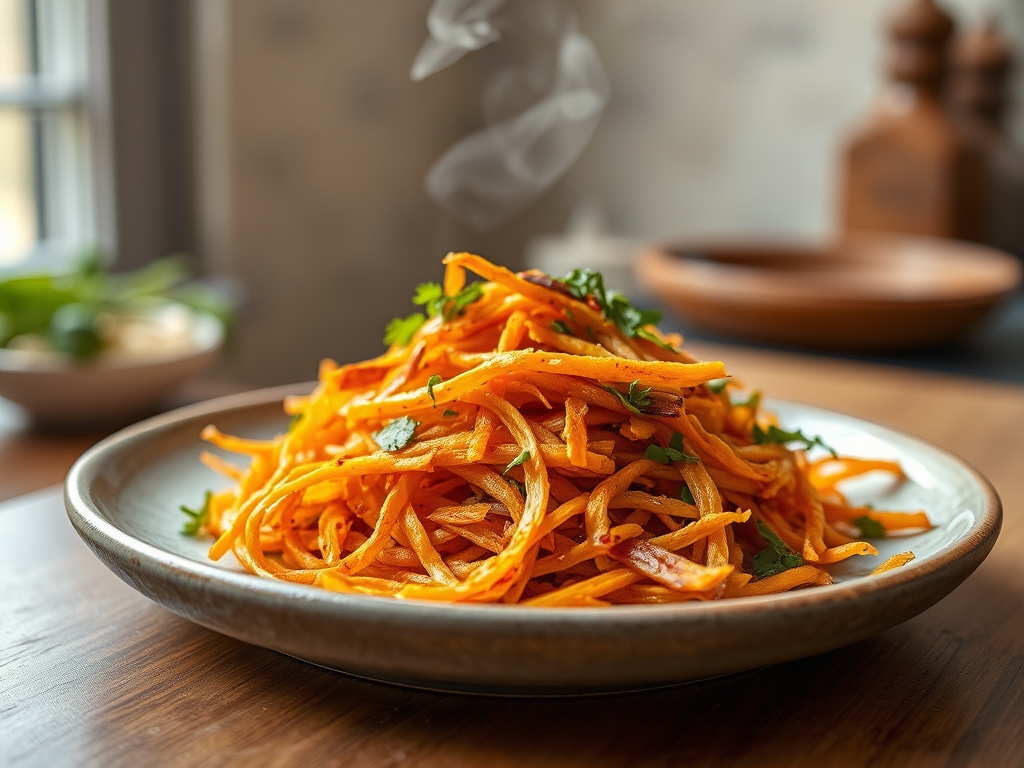
Picture this: a heavy-bottomed skillet sizzling on the burner while the scent of caramelizing sugars wafts through your kitchen. There is a specific, addictive magic in the way shredded sweet potato recipes transform from humble, earthy roots into golden, jagged nests of pure crunch. We are not just making dinner; we are mastering the art of the Maillard reaction.
The secret to that elusive, ultra-crispy texture lies in the surface area. By shredding the tuber, you maximize the contact points between the vegetable and the heat source. This creates a symphony of textures: a glass-shatter exterior that gives way to a creamy, custard-like center. Whether you are craving a savory breakfast hash or a piquant side dish, these seven hacks will elevate your kitchen game from amateur to artisanal. Forget soggy, limp fries; we are chasing the high-decibel crunch that only precision technique can provide.
The Gathers:
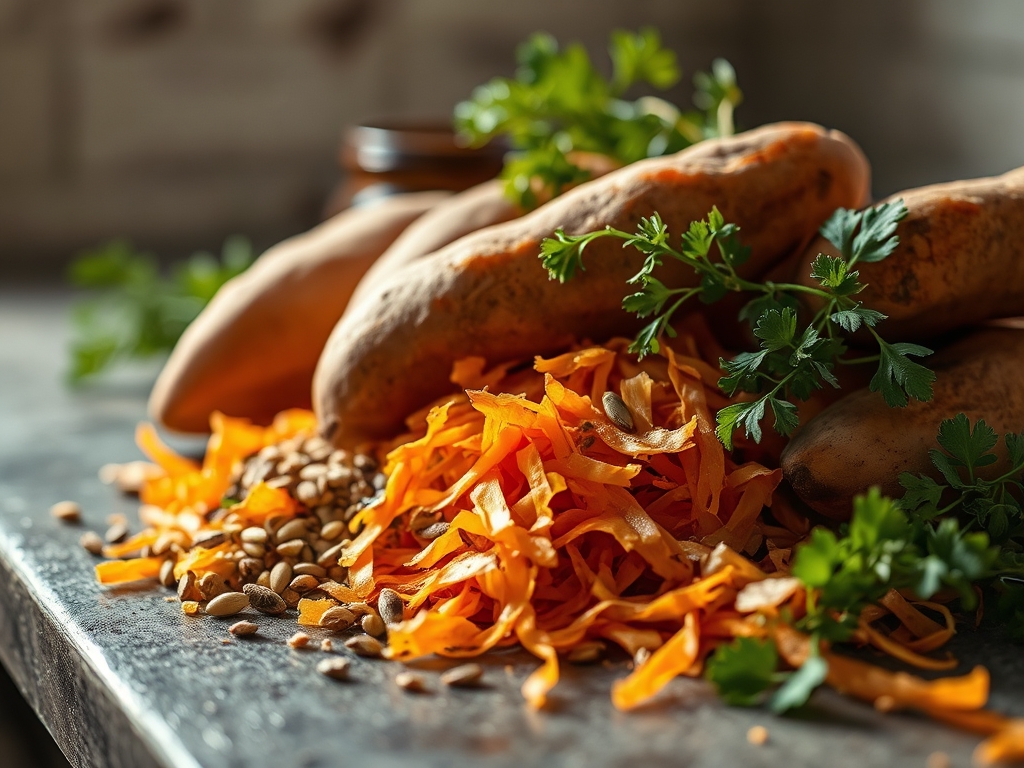
To achieve structural integrity in your shredded sweet potato recipes, your mise-en-place must be clinical. Start with large, firm garnet or jewel sweet potatoes. These varieties possess the ideal starch-to-sugar ratio for browning without collapsing into mush. You will also need a high-quality fat with a high smoke point; think avocado oil or clarified butter (ghee) to avoid acrid, burnt notes during the long sear.
Gather your professional tools: a sharp box grater or a food processor with a coarse shredding disc is essential. You will also need a clean lint-free kitchen towel or a nut milk bag for the crucial moisture extraction phase. For seasoning, keep a digital scale nearby to ensure a 1.5 percent salt-to-weight ratio. This precision ensures the salt penetrates the cell walls through osmosis without making the final product overly saline.
Smart Substitutions: If you are avoiding nightshades, white yams offer a similar starch profile but a more neutral flavor. For a flavor boost, replace standard table salt with smoked Maldon sea salt or infuse your cooking oil with crushed garlic and rosemary before you begin the primary cook.
The Clock: Mastering the Chef's Flow
Efficiency in the kitchen is about heat management and "The Flow." Expect a total prep time of 15 minutes, primarily dedicated to the mechanical shredding and the vital "squeeze" step. The actual cook time ranges from 12 to 20 minutes depending on the density of your pan.
The Chef's Flow dictates that you prepare your garnishes and sauces while the potatoes are under tension in the towel. This allows the starch to stabilize. Never rush the pre-heating phase. A cold skillet is the enemy of crispiness; your heavy-bottomed skillet requires at least three minutes of medium-high heat to reach the thermal mass necessary to prevent the potatoes from sticking.
The Masterclass:
1. The Great Extraction
After shredding your potatoes, place them in the center of a kitchen towel. Twist the top and squeeze with all your might. You want to remove as much viscous liquid as possible. This liquid is full of excess starch and water that would otherwise steam the potatoes rather than fry them.
Pro Tip: This process prevents enzymatic browning. By removing the surface moisture and the polyphenol oxidase enzymes that react with oxygen, you ensure your shreds stay vibrant orange rather than turning a muddy grey.
2. The Aeration Toss
Once dry, transfer the shreds to a large bowl. Use your fingers or a pair of tongs to fluff the strands. Do not pack them down. Sprinkle your seasonings from a height of twelve inches to ensure even distribution across the increased surface area.
Pro Tip: Aerating the shreds introduces oxygen pockets. When these hit the hot oil, the air expands rapidly; this creates a lighter, more delicate "shatter" in the final crust.
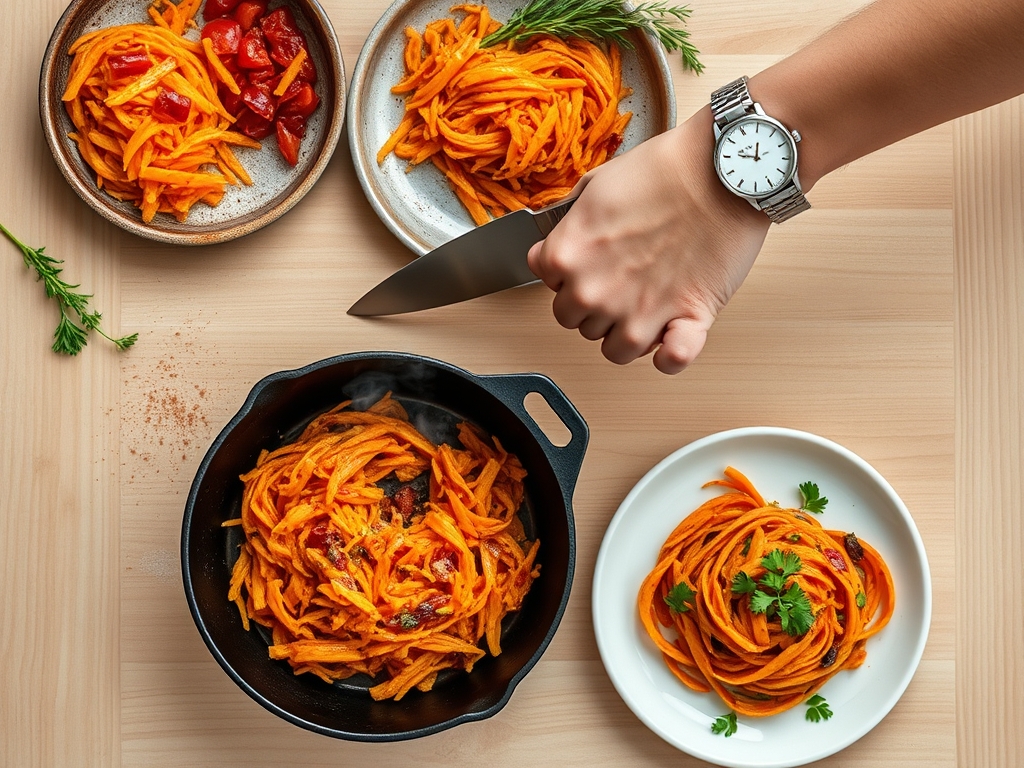
3. The Thermal Shock
Add your fat to the skillet until it shimmers. Carefully lay the shredded sweet potato into the pan in a thin, even layer. You should hear an immediate, aggressive hiss. This is the sound of moisture rapidly evaporating, which is the precursor to the Maillard reaction.
Pro Tip: Using a heavy-bottomed skillet provides high thermal mass. This prevents the pan temperature from dropping when the cold potatoes hit the surface, ensuring the fat sears rather than soaks into the vegetable.
4. The Patience Phase
Resist the urge to stir. Use a metal spatula or a bench scraper to press down lightly on the nests. This increases the contact patches with the heat. Let them cook undisturbed for at least six minutes.
Pro Tip: This allows for starch gelatinization. The internal starches swell and set, creating a structural framework that holds the nest together even after you flip it.
5. The Flip and Deglaze
Once the edges are deep mahogany, flip the nests in sections. If the pan looks dry, add a small knob of butter. As the butter foams, it will undergo its own browning, infusing the potatoes with a nutty, toasted aroma.
Pro Tip: This is a form of "dry deglazing." The fat picks up the caramelized sugars stuck to the bottom of the pan and redistributes that concentrated flavor back into the potatoes.
6. The Carryover Finish
Move the crispy nests to a wire cooling rack rather than a paper towel. This allows air to circulate around the entire surface, preventing the bottom from becoming soggy due to trapped steam.
Pro Tip: Thermal carryover means the internal temperature will continue to rise by a few degrees even after removal from the heat. The wire rack ensures this heat dissipates without creating condensation.
7. The Final Infusion
While the potatoes are still hot, use a microplane to zest fresh lemon or grate a hard cheese like Pecorino Romano over the top. The residual heat will slightly melt the cheese and release the essential oils from the citrus.
Pro Tip: Adding acids or fats at the very end provides a "piquant" contrast to the deep, earthy sweetness of the tuber, balancing the flavor profile on the palate.
The Deep Dive:
From a macro perspective, shredded sweet potato recipes are a powerhouse of complex carbohydrates and Vitamin A. One medium potato provides over 400 percent of your daily recommended intake of beta-carotene. Because we are using high-quality fats and controlled heat, we preserve these fat-soluble vitamins while keeping the glycemic index lower than traditional white potato preparations.
Dietary Swaps: To make this Keto-friendly, blend the shredded sweet potato with shredded daikon radish to lower the net carb count. For a Vegan version, use avocado oil or coconut oil instead of ghee. All these methods are naturally Gluten-Free, provided you avoid cross-contamination in your spice blends.
The Fix-It:
- Soggy Results: You did not squeeze enough water out. Fix: Return them to a hot oven at 400 degrees on a wire rack for five minutes to dehydrate.
- Burnt Exterior, Raw Interior: Your heat was too high. Fix: Lower the flame and cover the pan with a lid for two minutes to use steam to cook the center, then uncover to re-crisp.
- Falling Apart: You flipped too early. Fix: Add a teaspoon of cornstarch or arrowroot powder to the raw shreds next time to act as a binder.
Meal Prep: To reheat and maintain "day-one" quality, avoid the microwave at all costs. Use an air fryer at 375 degrees for three minutes or a dry skillet over medium heat. This re-activates the fats and restores the crystalline structure of the starch.
The Wrap-Up:
Mastering shredded sweet potato recipes is a rite of passage for any home cook looking to marry science with soul. By understanding the physics of moisture removal and the chemistry of caramelization, you turn a simple root vegetable into a gourmet experience. These seven hacks are your roadmap to a world of texture and flavor that will have your friends begging for your "secret" recipe. Now, grab that grater and get to work; your perfectly crispy destiny awaits!
The Kitchen Table:
How do I stop shredded sweet potatoes from turning brown?
Squeeze the shredded potatoes in a towel immediately after grating. Removing the moisture and surface starches limits the enzymatic reaction with oxygen. You can also toss them with a small amount of lemon juice to provide an acidic barrier against oxidation.
Why are my shredded sweet potatoes not getting crispy?
The most common culprit is overcrowding the pan. When too many shreds are packed together, they release steam that cannot escape. This steams the potatoes instead of frying them. Cook in smaller batches to ensure every strand hits the hot oil.
Can I shred sweet potatoes ahead of time?
Yes, but you must store them correctly. Place the shreds in a bowl of cold water with a splash of vinegar and keep them in the fridge. This prevents browning. Be sure to dry them thoroughly before cooking to ensure maximum crispiness.
What is the best oil for frying shredded sweet potatoes?
Use an oil with a high smoke point and neutral flavor, such as avocado oil, grapeseed oil, or refined coconut oil. These fats can handle the sustained heat required for caramelization without breaking down and creating bitter, off-flavors in your dish.