
Picture a heavy bottomed skillet sizzling on a marble countertop while the aroma of toasted garlic and sea salt fills your kitchen. We are diving into the world of artichoke salmon recipes tonight; a pairing that feels like a coastal Italian vacation but functions like a high performance fuel for your brain. It is the ultimate culinary power couple.
The magic here lies in the contrast between the fatty, buttery flakes of a perfectly seared sockeye and the earthy, slightly metallic tang of the artichoke heart. Most people shy away from artichokes because they look like prehistoric armor, but once you unlock their nutty sweetness, they become the perfect foil for the rich omega 3 oils in the fish. We are not just cooking; we are orchestrating a chemical reaction where acidity meets healthy fats to create a bright, piquant profile that lingers on the palate. Whether you are aiming for a crisp skin or a delicate poach, these six variations will transform your weeknight rotation into a five star experience. Let us get your apron on and your pans hot.
The Gathers:
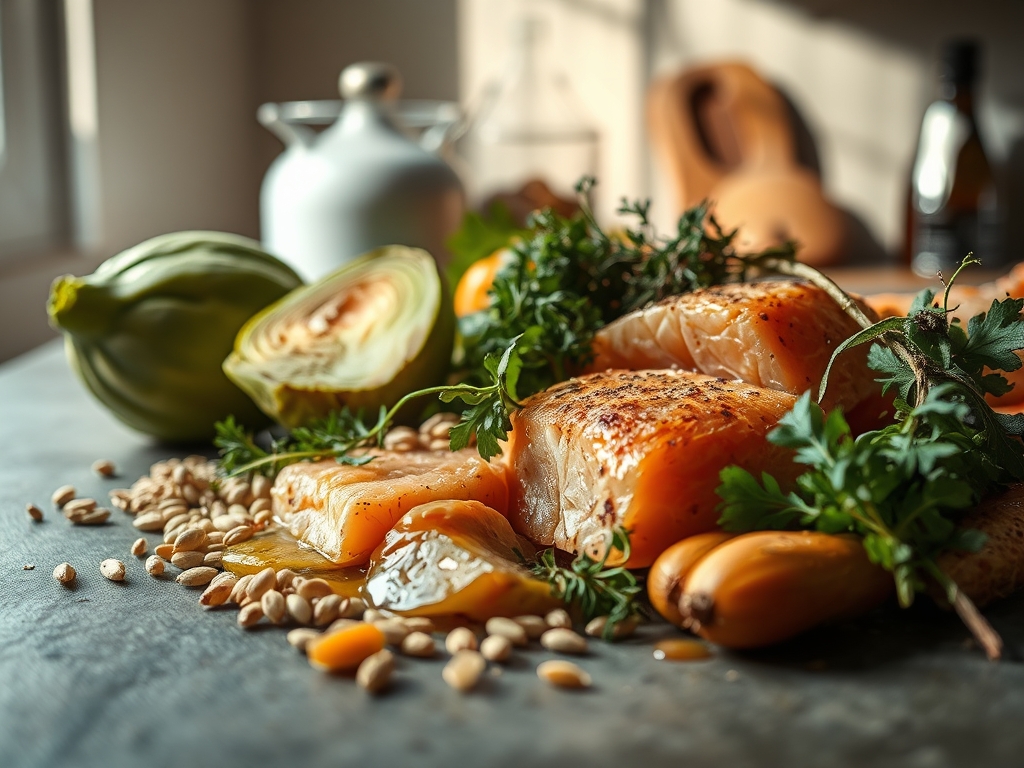
Before we ignite the burners, we must respect the mise-en-place. For these artichoke salmon recipes, your primary protein should be center-cut fillets, ideally skin-on to protect the delicate flesh from direct thermal shock. You will need high quality artichoke hearts; if you are not trimming fresh globes, opt for those packed in water or a light brine rather than heavy oil to maintain control over the lipid profile of your dish.
Your workspace should feature a microplane for zesting lemons, a digital scale for precise portioning, and a saucier for emulsifying any accompanying pan sauces. Gather fresh dill, capers for a burst of salinity, and cold unsalted butter to finish your sauces with a glossy sheen.
Smart Substitutions:
If you cannot find fresh artichokes, frozen hearts are superior to canned varieties because they lack the high sodium content and mushy texture. For a vegan twist on the side, hearts of palm offer a similar fibrous structure. If salmon is unavailable, steelhead trout is a near identical biological substitute with a slightly milder finish. Always use a high smoke point oil like avocado oil for searing; extra virgin olive oil is best reserved for finishing to preserve its volatile aromatic compounds.
The Clock
Efficiency in the kitchen is about understanding the Chef's Flow. Preparing artichoke salmon recipes generally requires 15 minutes of active prep and 12 to 18 minutes of cook time. The "flow" dictates that you prep your aromatics while the salmon tempers on the counter. Cold fish hits a hot pan and causes the muscle fibers to contract violently, pushing out moisture; letting it sit for 10 minutes ensures an even cook.
Total time from fridge to table is roughly 35 minutes. This includes the crucial five minute rest period where thermal carryover finishes the interior of the fish without drying out the exterior. Use this time to deglaze your pan and whisk together a quick emulsion.
The Masterclass
1. Temper and Pat Dry
Remove your salmon from the refrigerator and use a paper towel to wick away every drop of surface moisture. Moisture is the enemy of the Maillard reaction; if the skin is damp, it will steam rather than crisp.
Pro Tip: This is about thermodynamics. Water evaporates at 212 degrees Fahrenheit, but browning happens above 300 degrees. By removing surface water, you allow the heat to immediately begin browning the proteins.
2. The Initial Sear
Heat your heavy bottomed skillet until the oil shimmers. Lay the salmon skin side down using tongs, pressing gently with a fish spatula to ensure full surface contact. This prevents the skin from curling as the collagen contracts.
Pro Tip: Use the "cold press" method. Pressing the fish for the first 30 seconds ensures the skin stays flat, resulting in an even, glass like crunch across the entire surface.
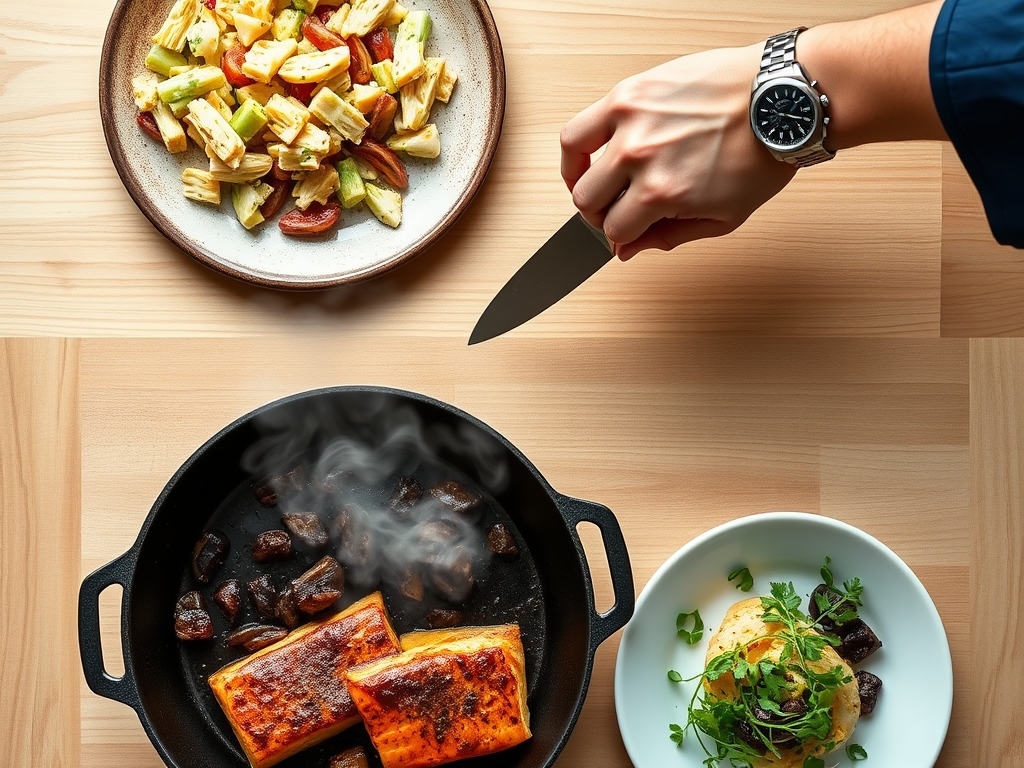
3. Incorporate the Artichokes
Once the salmon is 70 percent cooked from the bottom up, toss in your halved artichoke hearts. Allow them to sit in the rendered salmon fat to infuse the oil with their earthy essence.
Pro Tip: Artichokes contain cynarin, which makes subsequent bites of food taste sweeter. Searing them alongside the fish creates a complex flavor bridge between the savory fat and the vegetable.
4. Deglaze and Emulsify
Remove the fish and set it aside. Add a splash of dry white wine or lemon juice to the pan. Use a bench scraper or whisk to lift the fond (those brown bits on the bottom) into the liquid.
Pro Tip: This is a chemical extraction of flavor. The acidity in the wine dissolves the caramelized proteins, creating a concentrated base for your sauce.
5. The Butter Finish
Turn off the heat and whisk in a tablespoon of cold butter. This creates a viscous emulsion that coats the artichokes and salmon without feeling greasy.
Pro Tip: This is called "monter au beurre." The cold butter incorporates slowly into the warm liquid, creating a stable suspension of fat in water that provides a luxurious mouthfeel.
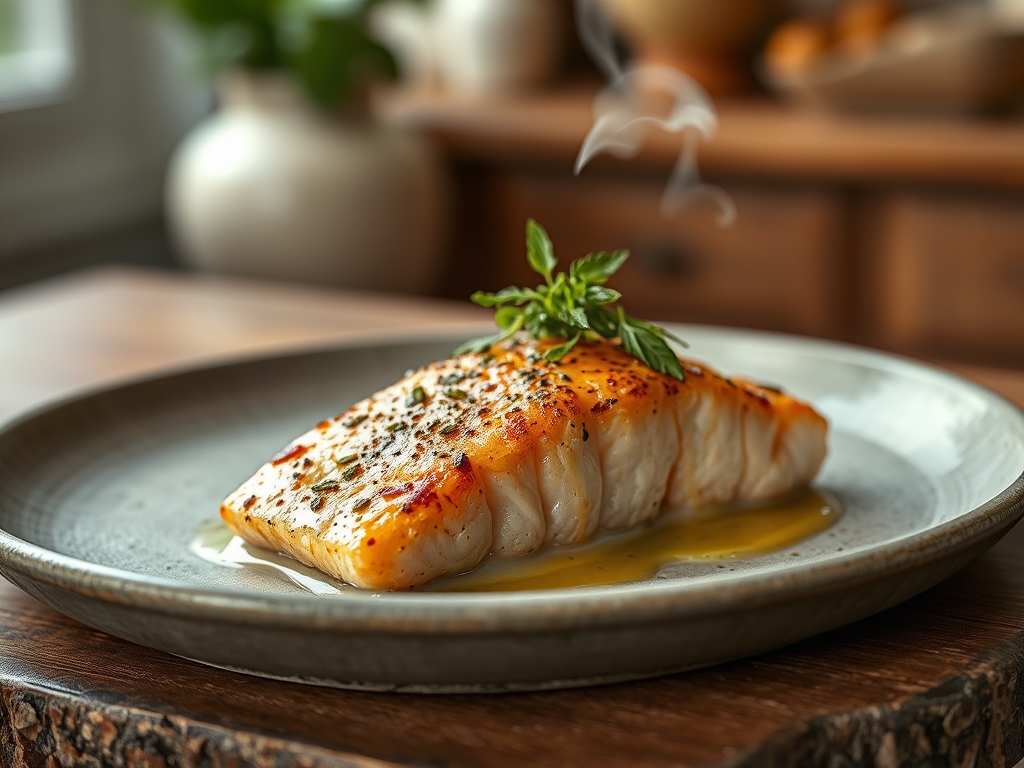
6. The Rest
Plate the salmon and spoon the artichoke mixture over the top. Let the dish sit for three minutes before serving.
Pro Tip: Resting allows the internal juices to redistribute. If you cut into the fish immediately, the pressure from the contracted muscle fibers will push the moisture out, leaving the salmon dry.
The Deep Dive
Nutritionally, artichoke salmon recipes are a powerhouse. A standard portion provides roughly 35 grams of high quality protein and 12 grams of heart healthy monounsaturated fats. Artichokes add a massive fiber boost; one medium heart contains about 7 grams of prebiotic fiber, which supports gut health.
Dietary Swaps:
For a Keto version, double the butter and omit any starch sides. For Vegan guests, replace the salmon with a thick "steak" of roasted cauliflower seasoned with kelp granules to mimic the oceanic flavor. All these recipes are naturally Gluten Free as long as you avoid flour based thickeners in your sauces.
The Fix-It:
- Skin sticking to the pan? You likely tried to flip it too early. The fish will naturally release from the metal once the proteins have fully denatured and browned.
- Albumin (white gunk) appearing? This means the heat was too high. The muscle fibers contracted too fast, squeezing out the liquid protein. Lower your flame.
- Bland artichokes? They need salt and acid. Increase the lemon juice or add a teaspoon of caper brine to the pan during the deglazing phase.
Meal Prep:
To reheat without ruining the texture, avoid the microwave. Use a low oven (275 degrees) with a splash of water in the dish, covered tightly with foil. This creates a gentle steam environment that rehydrates the fish instead of "re-cooking" it.
The Wrap-Up
Mastering artichoke salmon recipes is about more than just following a list of ingredients; it is about understanding how heat, acid, and fat interact to create a balanced masterpiece. You now have the technical knowledge to sear like a pro and the scientific insight to troubleshoot any kitchen mishap. Go grab your tongs and get to work. Your kitchen is about to smell incredible, and your body will thank you for the nutrient dense fuel.
The Kitchen Table
Can I use canned artichokes for these recipes?
Yes, but rinse them thoroughly first. Canned versions are often stored in a high sodium brine that can overwhelm the delicate flavor of the salmon. Pat them dry before searing to ensure they still get a nice golden crust.
How do I know when the salmon is perfectly cooked?
Use a digital thermometer to check for an internal temperature of 125 degrees Fahrenheit for medium rare. The fish should be opaque on the outside but still slightly translucent and flaky in the very center.
Why does my salmon skin always turn out soggy?
Soggy skin is caused by residual moisture or low heat. Ensure the skin is bone dry before it hits the pan and use a heavy skillet that retains heat well to achieve that signature potato chip crunch.
What is the best way to store leftovers?
Store salmon and artichokes in an airtight glass container for up to two days. To maintain the best quality, keep the sauce in a separate small jar and combine them only when you are ready to reheat.