
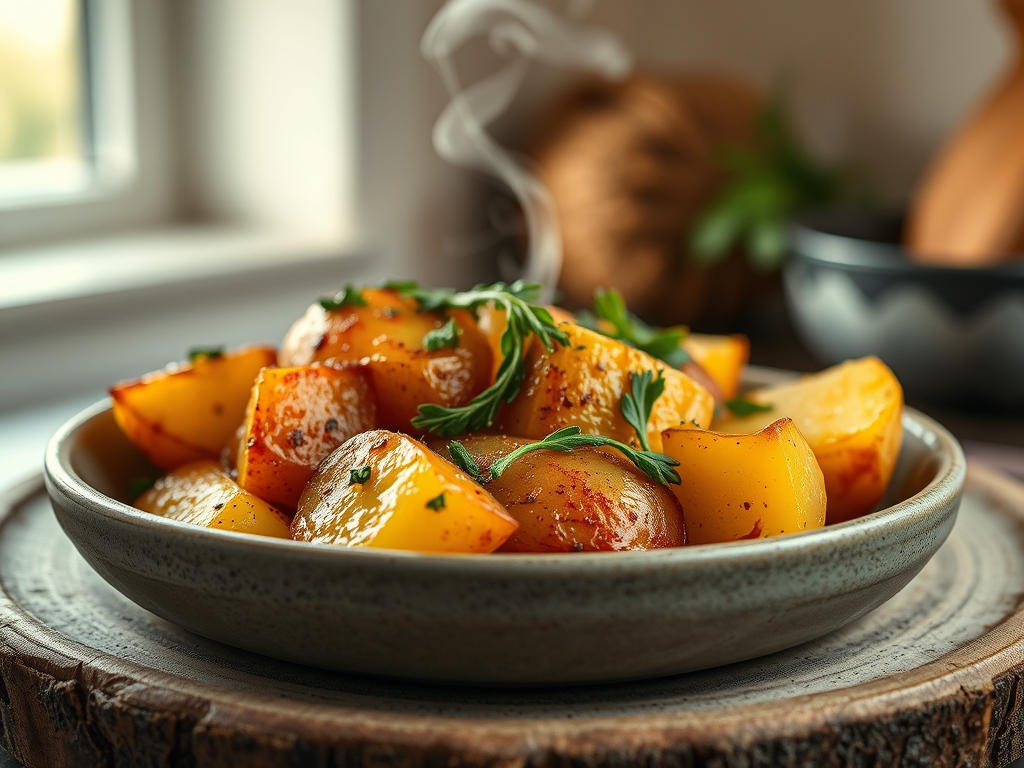
Imagine the sound of a heavy-bottomed skillet meeting a flame; that sharp, metallic ring is the starting bell for the ultimate weeknight victory. We have all been there, staring at a bag of Russets while the clock ticks toward dinner, wondering if we can actually achieve that elusive shatter-crisp crust without a deep fryer or a two-hour roasting window. The answer is a resounding yes. Mastering stovetop potato recipes is less about luck and more about manipulating starch molecules and heat transfer to create a textural masterpiece in under twenty minutes. We are talking about gold-standard spuds that are creamy enough to melt on the tongue but rugged enough to hold their own against a piquant garlic aioli.
Forget the mushy, gray cubes of your past. We are diving into the physics of the pan to ensure every edge is perfectly rendered and every center is fluffy. By understanding how to control surface moisture and when to introduce fats, you can transform a humble tuber into a high-end side dish. This is where kitchen intuition meets hard science. Let us get your mise-en-place ready and your burners primed for the best stovetop potato recipes you have ever tasted.
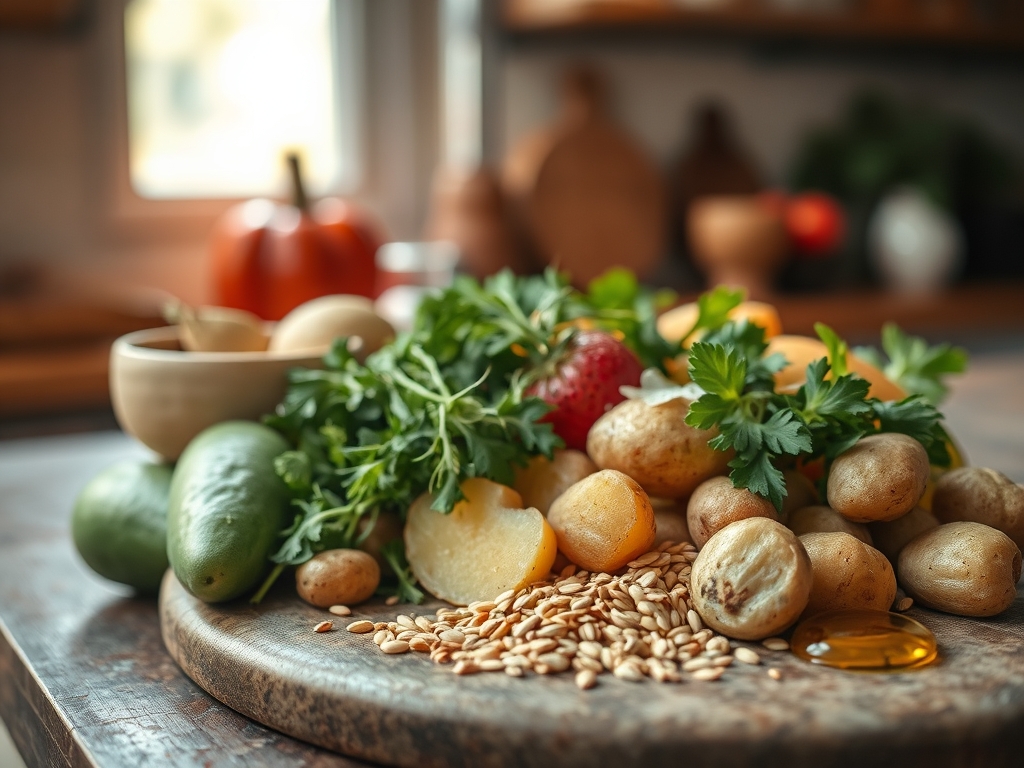
The Gathers:
To execute these secrets, your workstation must be a temple of efficiency. Start with the starch: high-starch varieties like Russets provide the fluffiest interior, while waxy Yukon Golds offer a viscous, buttery mouthfeel that holds its shape during a vigorous sauté. You will need a high-smoke-point fat; think clarified butter or avocado oil; to ensure you can reach the temperatures required for the Maillard reaction without scorching.
Grab your digital scale to ensure uniform sizing, which is the secret to even cooking. Your aromatics should be prepped and ready: fresh rosemary, thyme, and garlic cloves that have been smashed to release their essential oils. For "Smart Substitutions," if you are out of fresh herbs, a pinch of smoked paprika or nutritional yeast can add a savory, umami depth. If you find yourself without a traditional skillet, a saucier with sloped sides is an excellent alternative for tossing potatoes to ensure every surface is coated in shimmering fat.
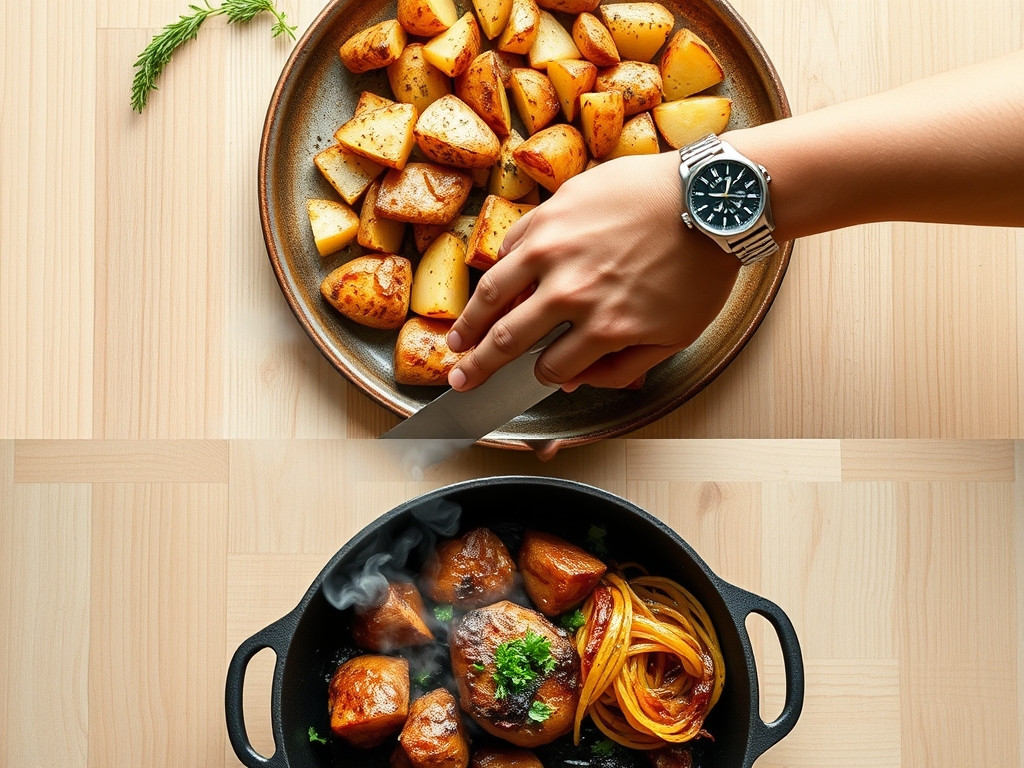
The Clock
Efficiency in the kitchen is all about "Chef's Flow," the art of overlapping tasks so no second is wasted. For these lightning-fast stovetop potato recipes, your active prep time should be exactly seven minutes. This includes washing, peeling (if desired), and dicing into half-inch cubes. The total cook time clocks in at twelve to fifteen minutes.
The flow works like this: while your heavy-bottomed skillet preheats over medium-high heat, you are dicing. By the time the last potato hits the bench scraper, the oil should be shimmering but not smoking. The first five minutes of cooking are "hands-off" to allow the initial crust to form; this is when you tidy your station or prep your garnish. The final minutes are for tossing and infusing aromatics. This synchronized rhythm ensures that by the time your main protein is resting, your potatoes are hitting the plate at their peak temperature.
The Masterclass
1. The Surface Dry
Before the potatoes ever touch the pan, they must be bone dry. Use a clean kitchen towel to buff away any surface moisture. Water is the enemy of the crisp; if the surface is wet, the energy of the pan goes into evaporating that water rather than browning the starch.
Pro Tip: This prevents "steam-shielding," where a layer of vapor prevents the potato from making direct contact with the hot oil, ensuring an immediate sear.
2. The Cold Start Hybrid
Start your potatoes in a cold pan with the oil. As the pan heats up, the interior of the potato begins to soften before the outside hardens. This creates a gradient of texture that is impossible to achieve with a pre-heated pan alone.
Pro Tip: This method manages enzymatic browning by slowly raising the temperature, allowing the starches to gelatinize uniformly from the core outward.
3. The Salt Timing
Do not salt your potatoes at the beginning. Salt draws out moisture through osmosis, which will turn your crisp sauté into a soggy steam-fest. Save the fine sea salt for the final three minutes of cooking.
Pro Tip: Delaying salt preserves the structural integrity of the cell walls, keeping the exterior rigid while the interior remains light.
4. The Lid Trick
For the middle five minutes of cooking, place a lid over the skillet. This traps just enough steam to finish cooking the centers of the cubes without needing to boil them beforehand.
Pro Tip: This utilizes thermal carryover and steam conduction to soften the pectin in the potato's cell walls without leaching out flavor into a pot of water.
5. The Aeration Toss
Use tongs or a confident flick of the wrist to toss the potatoes frequently in the final stages. This introduces air into the pan, which helps to cool the surface fat slightly and prevents the delicate aromatics from burning.
Pro Tip: Aeration helps to evenly distribute the rendered fats, ensuring that every microscopic crevice of the potato is encapsulated in a crisp shell.
6. The Microplane Finish
Once the heat is off, grate a fresh clove of garlic or a dusting of Parmesan cheese over the hot potatoes using a microplane. The residual heat is enough to bloom the flavor without making the garlic bitter.
Pro Tip: This technique captures the volatile aromatic compounds that would otherwise be destroyed by the intense direct heat of the burner.
7. The Acid Deglaze
A tiny splash of apple cider vinegar or lemon juice at the very end cuts through the richness of the oil. Use your bench scraper to lift any browned bits (the fond) from the bottom of the pan.
Pro Tip: The acid balances the pH of the dish, brightening the earthy notes of the potato and making the flavors "pop" on the palate.
8. The Fat Infusion
Add a knob of cold butter in the final sixty seconds. As it melts, it emulsifies with the remaining oil and the starch dust in the pan to create a thin, savory glaze.
Pro Tip: This creates a viscous coating that helps seasonings stick to the potato rather than falling to the bottom of the bowl.
9. The Rest Period
Transfer the potatoes to a wire rack for sixty seconds before serving. This allows the internal steam to stabilize so the crust does not soften immediately upon plating.
Pro Tip: Resting prevents the "sweat effect," where trapped steam under the potato softens the bottom crust, ruining your hard work.
The Deep Dive
From a macro perspective, potatoes are nutritional powerhouses, offering more potassium than bananas and a significant dose of Vitamin C. For those on specific diets, these stovetop potato recipes are naturally gluten-free. For a vegan swap, use extra virgin olive oil or coconut oil instead of butter. If you are keto-adjacent, try this exact method with radishes or turnips; they contain fewer carbs but react similarly to the high-heat sauté method.
"The Fix-It" guide for common pitfalls:
- Soggy Spuds: You overcrowded the pan. The potatoes released more steam than the skillet could vent. Fix: Cook in batches or use a larger pan.
- Burnt Outside, Raw Inside: The heat was too high. Fix: Lower the flame and use the "Lid Trick" mentioned in Step 4 to speed up internal cooking.
- Sticking to the Pan: You tried to flip them too soon. Fix: Wait for the starch to fully caramelize; the potato will "release" itself from the metal once the crust is formed.
For meal prep, reheating is a science. Avoid the microwave, which turns starch into rubber. Instead, toss leftovers back into a dry heavy-bottomed skillet over medium heat. This re-activates the fats and recrisps the exterior, giving you "day-one" quality in about three minutes.
The Wrap-Up
There you have it; the definitive guide to conquering the stovetop potato. By treating your kitchen like a lab and your ingredients with respect, you have turned a basic vegetable into a gourmet experience. Remember, the key is controlling moisture and timing your heat. Whether you are serving these alongside a steak or eating them straight from the pan with a fork, you now have the technical prowess to make every bite count. Go forth and sauté with confidence!
The Kitchen Table
Why are my stovetop potatoes always mushy?
Mushiness usually results from overcrowding the pan or failing to dry the potatoes. When cubes are too close, they steam instead of sear. Use a large skillet and pat the potatoes dry to ensure a crisp, golden exterior.
Do I need to parboil potatoes before frying?
No, parboiling is unnecessary for these lightning-fast recipes. By using a lid for a few minutes during the sauté process, you trap enough steam to cook the centers while the exterior browns perfectly in the oil.
What is the best oil for stovetop potatoes?
Use oils with a high smoke point like avocado, grapeseed, or clarified butter (ghee). These fats can withstand the high temperatures needed for the Maillard reaction without breaking down or creating bitter, burnt flavors in your dish.
How do I keep potatoes from sticking to the skillet?
Ensure your pan is properly preheated and use enough fat to coat the bottom. Most importantly, do not flip the potatoes too early. They will naturally release from the pan's surface once a solid crust has formed.