
Close your eyes and imagine the scent of a kitchen transformed by patience; it is the intoxicating aroma of rendering fat and toasted peppercorns. We are not just cooking dinner tonight. We are mastering the art of the long game with these slow roast beef recipes. There is a specific kind of magic that happens when a tough, fibrous cut of muscle surrenders to steady, gentle heat. It is the difference between a chewy disappointment and a fork-tender masterpiece that dissolves on the tongue. We are chasing that perfect, edge to edge pink medium-rare center and a crust so savory it borders on the transcendental. Whether you are hosting a festive Sunday dinner or prepping for a week of high protein luxury, understanding the physics of heat transfer is your secret weapon. Let us turn your kitchen into a high end steakhouse laboratory where science meets soul.
The Gathers:
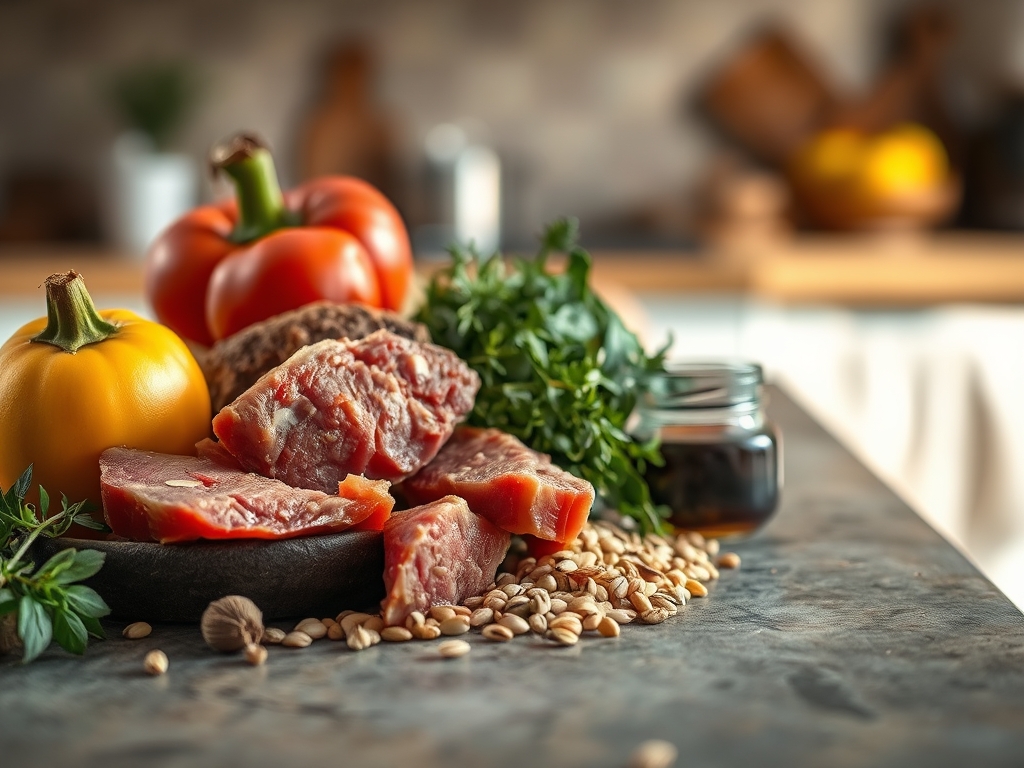
Before we ignite the flame, we must assemble our toolkit and ingredients with the precision of a chemist. Your primary subject should be a three to four pound cut; think Top Round, Bottom Round, or the majestic Eye of Round. These cuts are lean but possess the structural integrity required for a lengthy stay in the oven. You will need a heavy-bottomed skillet for the initial sear and a roasting pan with a fitted rack to ensure even airflow.
The flavor profile relies on a viscous binder and a coarse dry rub. Gather high quality kosher salt, cracked black tellicherry peppercorns, and dried aromatics like thyme and rosemary. For the wet components, keep a bottle of Worcestershire sauce and a piquant Dijon mustard nearby to act as your glue.
Smart Substitutions: If you are avoiding nightshades, swap paprika for ground turmeric and cumin for an earthy depth. If you lack a roasting rack, create a natural pedestal using thick slices of yellow onion and celery stalks. This not only elevates the meat but allows the juices to infuse the vegetables, creating a built-in base for a future jus. Always use a digital scale to weigh your salt; a ratio of one percent salt to the total weight of the meat is the gold standard for deep seasoning.
The Clock
Efficiency in the kitchen is about the Chef's Flow, which is the rhythmic synchronization of preparation and execution. Total active prep time is a brisk 20 minutes, but the passive phase is where the heavy lifting occurs.
Prep Time: 20 minutes (trimming, seasoning, and searing).
Cook Time: 2 to 4 hours depending on the desired internal temperature and the specific weight of your roast.
Resting Time: 30 minutes. This is non-negotiable.
The "flow" begins the night before. Salting your beef 24 hours in advance allows for osmosis to draw moisture out, dissolve the salt, and then pull that seasoned brine back into the center of the muscle fibers. If you are short on time, even a two-hour salted rest at room temperature will suffice to take the chill off the protein, ensuring a more even cook.
The Masterclass
1. The Tempering and Tying
Remove your beef from the refrigeration unit at least 60 minutes before cooking. Use butcher's twine to tie the roast at one-inch intervals. This creates a uniform cylindrical shape, which is essential for even heat distribution.
Pro Tip: This step utilizes thermal equilibrium. By bringing the internal temperature of the meat closer to room temperature, you prevent the outside from overcooking before the center reaches its target.
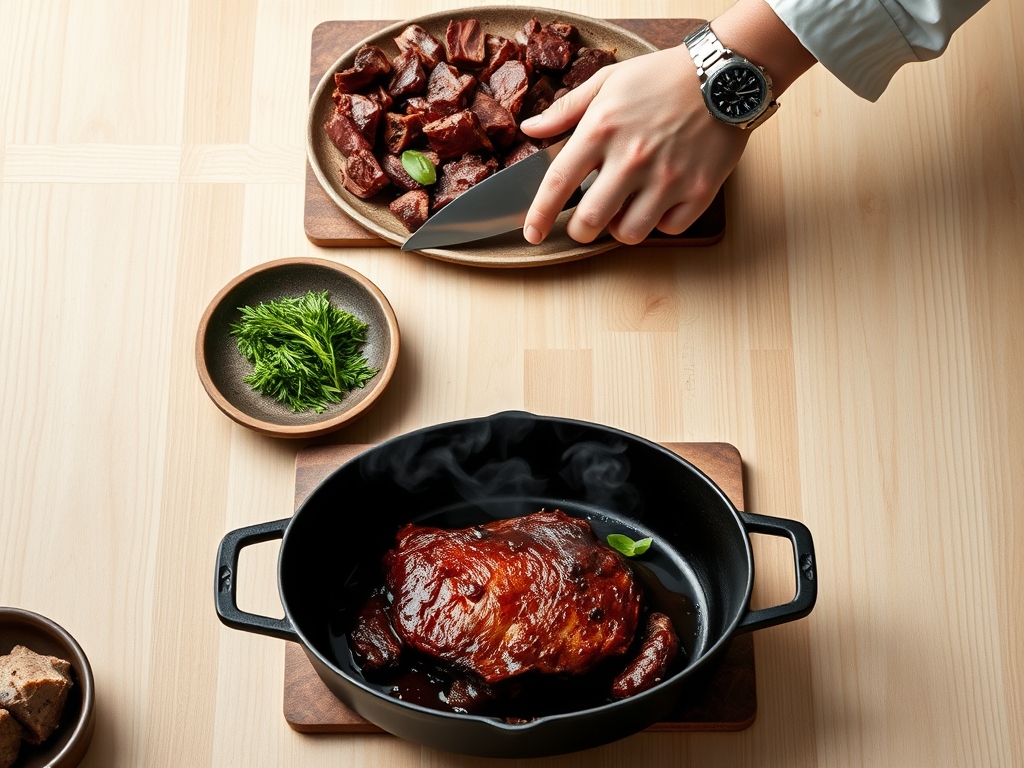
2. The Maillard Sear
Pat the surface bone-dry with paper towels. Heat a heavy-bottomed skillet with high-smoke-point oil until it shimmers. Use tongs to press each side of the beef into the pan for 2 to 3 minutes until a deep, mahogany crust forms.
Pro Tip: This is the Maillard Reaction. This chemical reaction between amino acids and reducing sugars creates hundreds of different flavor compounds that simply cannot be achieved through roasting alone.
3. The Low and Slow Ascent
Place the beef on your rack in a preheated oven at 225 degrees Fahrenheit. This low temperature prevents the muscle fibers from contracting too violently, which would squeeze out all the precious moisture.
Pro Tip: Low heat minimizes the temperature gradient. A high-heat oven creates a "gray ring" of overcooked meat; a low-heat oven ensures the beef is a consistent color from the crust to the core.
4. The Digital Monitoring
Insert the probe of a digital thermometer into the thickest part of the roast. For a perfect medium-rare, you are aiming for an exit temperature of 125 degrees Fahrenheit.
Pro Tip: Understanding thermal carryover is vital. The internal temperature will continue to rise by 5 to 10 degrees after you remove it from the oven as the residual heat from the exterior moves inward.
5. The Deglaze and Jus
While the meat rests, place your roasting pan (or the initial searing skillet) over medium heat. Pour in a splash of red wine or beef stock to deglaze the pan, using a bench scraper or wooden spoon to lift the "fond" (the caramelized bits).
Pro Tip: This process captures concentrated umami. Whisk in a knob of cold butter at the end to emulsify the sauce, giving it a glossy, professional finish.
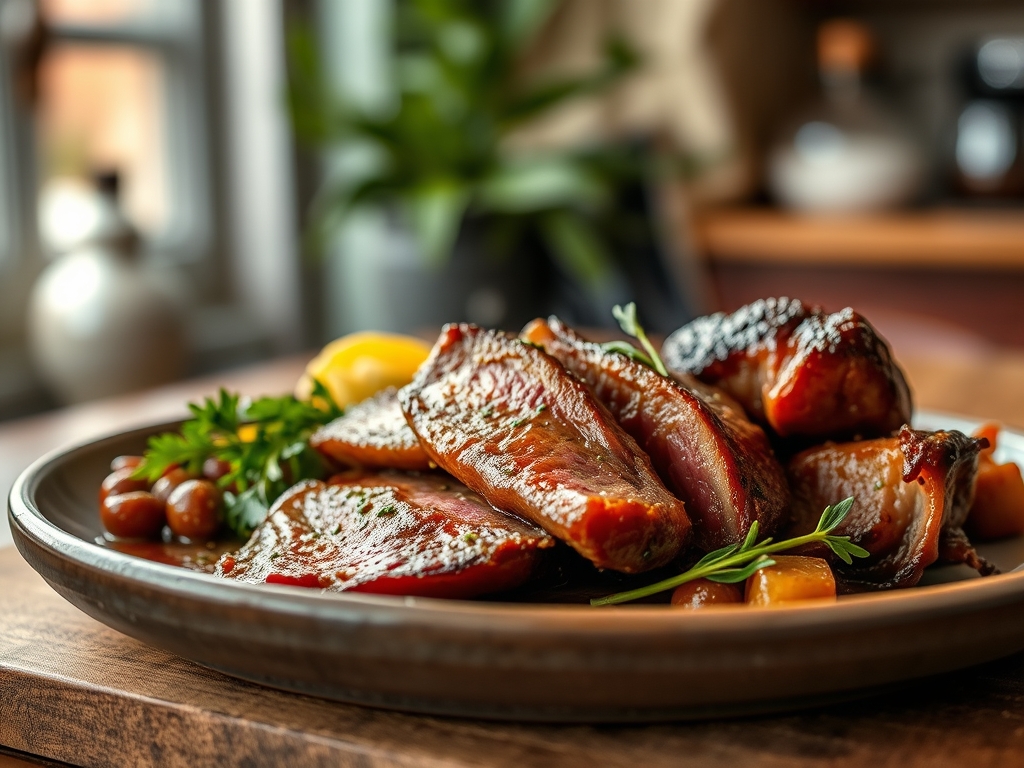
6. The Rest and Carve
Transfer the roast to a carving board and tent loosely with foil. Wait at least 20 to 30 minutes before slicing against the grain with a sharp carving knife.
Pro Tip: Resting allows for reabsorption. During cooking, proteins tighten and push juice toward the center. Resting allows those fibers to relax and redistribute the liquid, ensuring the juice stays in the meat and not on your board.
The Deep Dive
Macro Nutrition: Slow roast beef is a nutritional powerhouse. A 4-ounce serving typically provides 28g of protein, 10g of fat, and zero carbohydrates. It is rich in Vitamin B12, zinc, and bioavailable iron.
Dietary Swaps:
- Keto: This recipe is naturally keto-friendly. Serve with a side of buttery cauliflower mash.
- Vegan: Swap the beef for a large "roast" made of seasoned seitan or a whole roasted head of cauliflower basted in umami-rich soy and mushroom broth.
- Gluten-Free: Ensure your Worcestershire sauce is a certified GF brand; otherwise, swap for tamari.
The Fix-It:
- The Meat is Tough: You likely pulled it too early or used a cut with too much connective tissue for the time allowed. Fix: Slice it paper-thin to mechanically break the fibers.
- The Crust is Soggy: You likely skipped the "pat dry" step or crowded the pan. Fix: Flash the roast under a broiler for 60 seconds at the very end.
- No Flavor in the Center: You didn't salt early enough. Fix: Serve with a highly seasoned saucier of horseradish cream or the deglazed jus.
Meal Prep: To maintain "day-one" quality, reheat slices gently in a pan with a tablespoon of broth over low heat. Avoid the microwave, as it vibrates water molecules too rapidly, toughening the protein structures.
The Wrap-Up
Mastering slow roast beef recipes is a rite of passage for any home cook who values texture and depth. By respecting the science of the sear and the patience of the low-temperature roast, you transform a humble cut into a culinary event. Remember: the thermometer is your best friend, the rest is your greatest tool, and that mahogany crust is your reward. Now, go forth and roast with confidence; your kitchen is ready for its masterpiece.
The Kitchen Table
What is the best cut for slow roast beef recipes?
Cuts like Top Round, Bottom Round, or Eye of Round are ideal. They are lean and affordable; the slow roasting process breaks down their tough fibers, resulting in a tender, deli-style texture that is perfect for slicing.
How long should I rest my roast beef?
You must rest the beef for at least 20 to 30 minutes. This allows the internal juices to redistribute throughout the muscle fibers. If you cut it too soon, the moisture will leak out, leaving the meat dry.
Can I cook the roast without a rack?
Yes, you can use a "natural rack" by placing the meat on a bed of thick-cut carrots, onions, and celery. This prevents the bottom from steaming in its own juices and adds incredible flavor to your pan drippings.
What temperature is medium-rare for roast beef?
Aim to pull the beef out of the oven when the internal temperature hits 125°F. During the resting period, carryover cooking will bring the final temperature to a perfect 130°F to 135°F for a medium-rare finish.
Why is my roast beef gray instead of pink?
A gray interior usually means the oven temperature was too high. Cooking at 225°F or lower ensures a gentle heat transfer, resulting in a consistent pink color from the center all the way to the edges.