
Picture this: the kitchen is thick with the scent of smoldering sugar and earthy vanilla. You are standing over a tray of bubbling, golden-orange goodness, watching as the heat transforms simple tubers into something legendary. When we talk about sweet potato recipes baked marshmallows, we are not just discussing a side dish; we are engineering a masterpiece of texture. It is that perfect intersection of a silky, savory base and a pillowy, toasted crown that shatters with a satisfying crunch before melting away. Most people settle for mediocre mush, but we are here to master the chemistry of the Maillard reaction and the structural integrity of the perfect marshmallow char. This is about elevating a holiday staple into a year-round obsession using professional techniques that ensure every bite is a balanced explosion of flavor.
The Gathers:
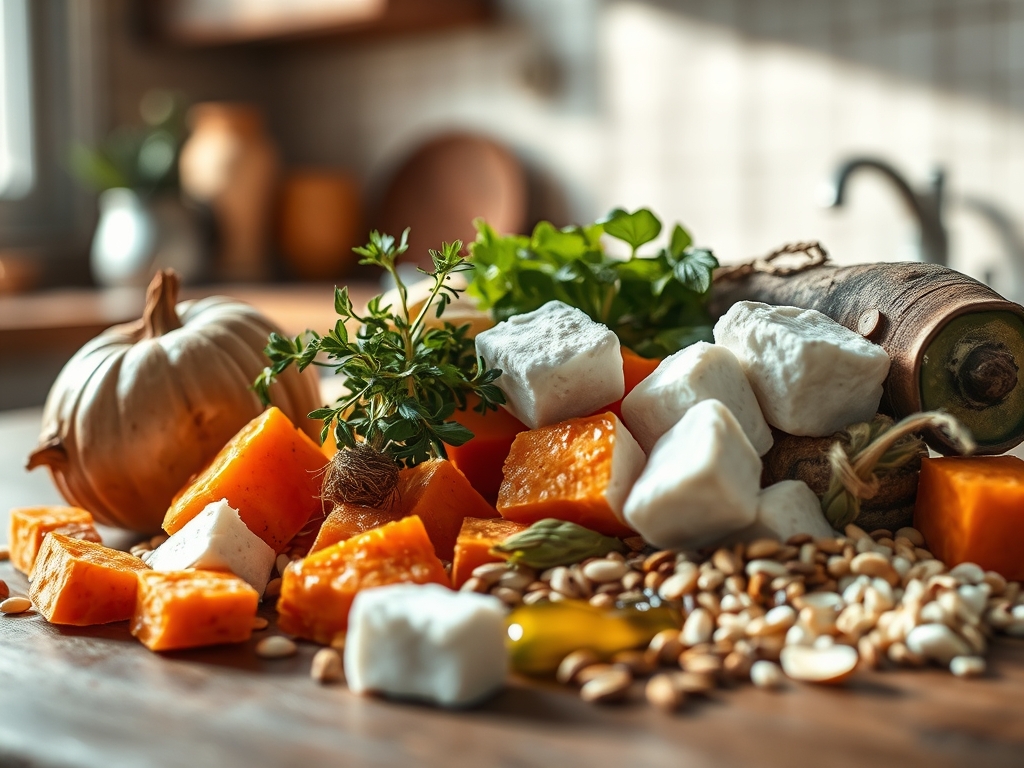
To begin our culinary architecture, we need high-quality raw materials. Start with Garnet or Jewel sweet potatoes; these varieties possess a high sugar content and a moist, fine-grained flesh that becomes incredibly viscous when roasted. You will need a digital scale to ensure your ratios are precise. For the base, gather unsalted European-style butter (which has a lower water content for better emulsification), heavy cream, Grade A maple syrup, and a pinch of Maldon sea salt to provide a piquant contrast to the sweetness.
For the topping, we are looking for high-density marshmallows. Cheap, airy versions will simply evaporate under the broiler. We also need aromatic reinforcements: fresh nutmeg to grate with your microplane, Madagascar bourbon vanilla bean paste, and a hint of smoked paprika to add depth.
Smart Substitutions: If you are looking to lighten the profile, swap the heavy cream for full-fat coconut milk. The lauric acid in the coconut milk provides a similar mouthfeel while adding a subtle tropical note. For a refined sugar alternative, use honey or agave nectar, though be aware that honey will darken faster due to its lower fructose-to-glucose ratio.
The Clock: Timing the Masterpiece
Total time commitment is approximately 75 minutes, but the "Chef's Flow" is what matters. The first 45 to 60 minutes are passive roasting time. This is when the enzymatic browning occurs deep within the potato skins. Use this window to prep your garnishes and toast any pecans in a heavy-bottomed skillet. The active phase involves only 15 minutes of whipping and assembly. By the time the potatoes are cool enough to handle, your oven should be transitioning from a roasting temperature to a high-intensity broil. This sequence ensures that the base remains piping hot while the marshmallows achieve their caramelized exterior without melting into a puddle.
The Masterclass:
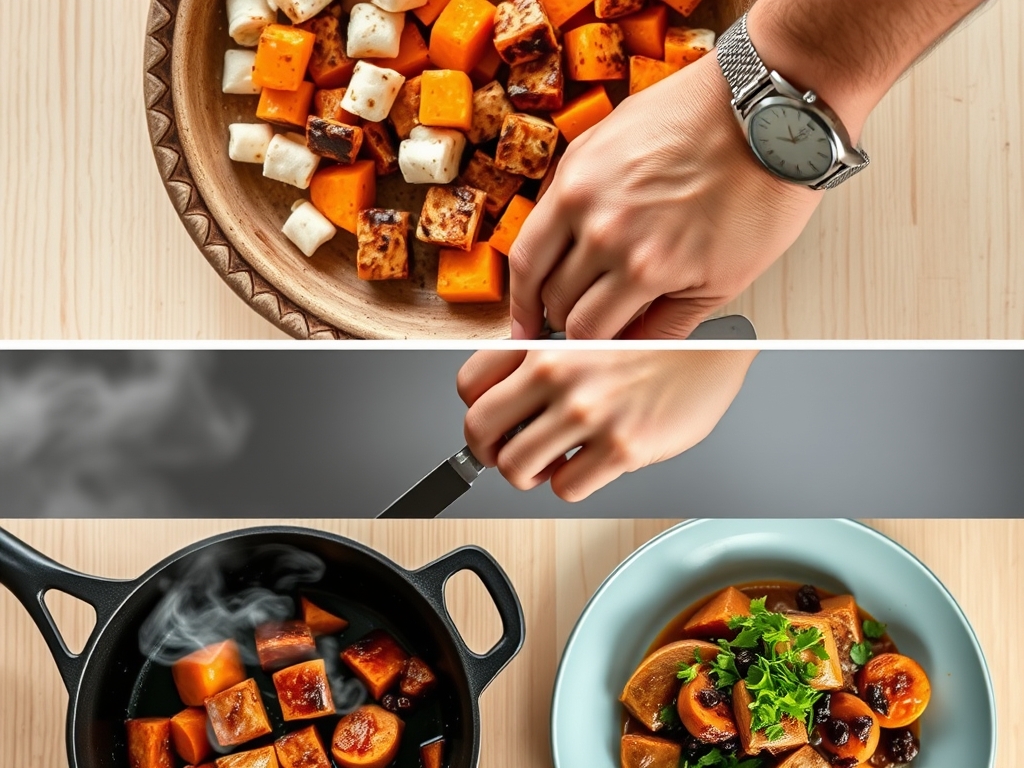
1. The Initial Roast
Scrub your tubers and pierce them several times with a fork to allow steam to escape. Place them directly on the center rack with a foil-lined sheet pan underneath to catch any escaping sugars that might render out. Roast at 400 degrees Fahrenheit until a paring knife slides in with zero resistance.
Pro Tip: This high-heat roasting triggers the conversion of starch into maltose. By roasting whole in the skin, you trap the moisture, creating a self-steaming environment that preserves the natural pectins.
2. The Extraction and Puree
Once the potatoes are cool enough to touch, use a bench scraper to slice them lengthwise. Scoop the vibrant flesh into a saucier or a large mixing bowl. Discard the skins or save them for a crispy snack later.
Pro Tip: Working with the potatoes while they are still warm (above 140 degrees Fahrenheit) is crucial. This allows the butter to melt instantly and integrate into the cellular structure of the potato, creating a stable emulsion.
3. The Aeration Phase
Add your butter, cream, and spices. Use a potato masher for a rustic texture, or an immersion blender if you want a professional, velvet-smooth consistency. You want to aerate the mixture slightly to keep it from feeling heavy on the palate.
Pro Tip: Over-processing can sometimes lead to a gummy texture if the starch granules are ruptured too violently. Use a folding motion with a silicone spatula to keep the fluffiness intact.
4. The Flavor Infusion
Fold in your maple syrup and vanilla. This is the moment to taste and adjust. If the mixture feels too dense, add a splash more cream to reach a ribbon-like consistency.
Pro Tip: Adding salt at this stage is a chemical necessity. Salt suppresses the perception of bitterness and enhances the volatile aromatic compounds in the vanilla and nutmeg.
5. The First Bake
Spread the mixture into a ceramic baking dish. Bake at 350 degrees Fahrenheit for 15 minutes. This step sets the proteins in the cream and ensures the dish is hot all the way through before the topping is added.
Pro Tip: This secondary bake allows for thermal carryover, ensuring that the center of the dish reaches a safe and palatable temperature without the marshmallows burning on top.
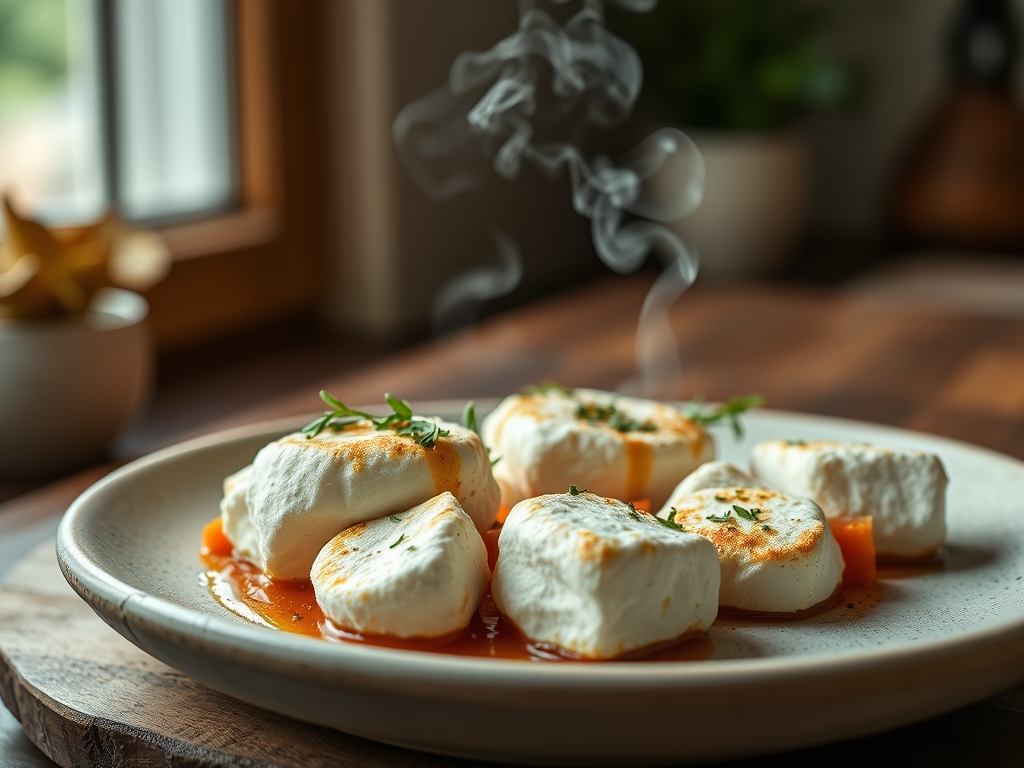
6. The Marshmallow Architecture
Remove the dish and layer your marshmallows in a tight, overlapping pattern. For an artisanal look, mix mini and jumbo marshmallows to create varied surface areas for browning.
Pro Tip: The varied sizes create "valleys" where heat can circulate, leading to a more complex textural experience with both soft and crunchy zones.
7. The Final Broil
Switch your oven to the broil setting. Position the rack about 6 inches from the heat source. Watch the dish like a hawk; marshmallows can go from golden to carbonized in under ten seconds.
Pro Tip: This is the Maillard reaction in its most visible form. The amino acids and reducing sugars in the marshmallows react under intense heat to create hundreds of new flavor compounds.
8. The Resting Period
Let the dish sit for five minutes before serving. This allows the sugars to stabilize and the marshmallow crust to "set" so it doesn't slide off when sliced.
Pro Tip: Resting allows the internal steam to redistribute, preventing the bottom of the dish from becoming watery as it cools.
9. The Finishing Touch
Garnish with a final sprinkle of flaky sea salt or a dusting of cinnamon. Use tongs to place any additional toasted nuts or herb sprigs precisely.
Pro Tip: A final hit of salt provides a "clean" finish to the palate, cutting through the high fat and sugar content of the dish.
The Deep Dive:
From a macro nutrition perspective, sweet potatoes are powerhouses of Beta-Carotene and fiber. While the marshmallows add simple carbohydrates, the fiber in the potatoes helps mitigate the glycemic spike. For a Vegan version, use vegan butter sticks and aquafaba-based marshmallows. For Keto enthusiasts, this dish is a challenge, but you can swap half the sweet potato for roasted cauliflower puree and use sugar-free marshmallows.
The Fix-It:
- Runny Base: If your puree is too thin, stir in a tablespoon of cornstarch or arrowroot powder before the second bake.
- Burned Topping: If the marshmallows char too quickly, scrape off the top layer, add fresh ones, and move the oven rack lower.
- Bland Flavor: Usually a result of under-salting. Add a squeeze of lemon juice to brighten the sugars.
Meal Prep: To reheat and maintain "day-one" quality, avoid the microwave. Use an oven at 300 degrees Fahrenheit covered with foil to prevent the marshmallows from further browning while the center warms.
The Wrap-Up:
Mastering sweet potato recipes baked marshmallows is a rite of passage for any serious home cook. It is a dish that demands respect for temperature and technique but rewards you with a symphony of flavors. Whether you are serving this at a festive gala or a cozy Sunday dinner, the science of the perfect char and the velvet puree will always impress. Now, grab your whisk and get to work!
The Kitchen Table:
Why are my marshmallows melting into liquid?
This usually happens if you use low-quality marshmallows with high corn syrup content. To fix this, ensure the potato base is not too watery and use the broiler for a quick, intense sear rather than a long bake.
Can I make this dish ahead of time?
Yes; prepare the sweet potato base up to two days in advance. Store it in the fridge, then perform the second bake and add the marshmallows just before serving to ensure the topping stays crisp and airy.
What is the best potato for this recipe?
Garnet or Jewel sweet potatoes are superior due to their high moisture and sugar content. Avoid "dry" varieties like Japanese White sweet potatoes, as they will not achieve the desired silky, viscous texture required for this specific dish.
How do I prevent the dish from being too sweet?
Balance the sugar with acidity and salt. Add a teaspoon of apple cider vinegar or lemon juice to the mash, and always use a generous pinch of sea salt to cut through the marshmallow topping's intensity.