
Picture the scent of rendered fat hitting a heavy-bottomed skillet; it is that golden, savory aroma that signals the start of something transformative. When you are hunting for chicken recipes cheap enough to fit a tight budget but sophisticated enough for a dinner party, the magic lies in the chemistry of the bird. We are not just boiling protein here. We are manipulating amino acids and thermal energy to turn the humblest cuts into velvet-textured masterpieces. Whether you are working with bone-in thighs or lean breasts, the goal is a piquant, restaurant-quality result that defies its price tag.
Most people assume that "budget" means "bland," but that is a fundamental misunderstanding of culinary physics. You do not need expensive saffron or truffle oil when you have the Maillard reaction on your side. By mastering the art of the sear and the science of the emulsified pan sauce, you can elevate a four-dollar pack of poultry into six distinct, high-impact meals. We are going to dive into the mechanics of heat transfer and moisture retention to ensure every bite is succulent. Grab your favorite apron and a glass of wine; we are about to turn your kitchen into a high-efficiency laboratory of flavor.
The Gathers:
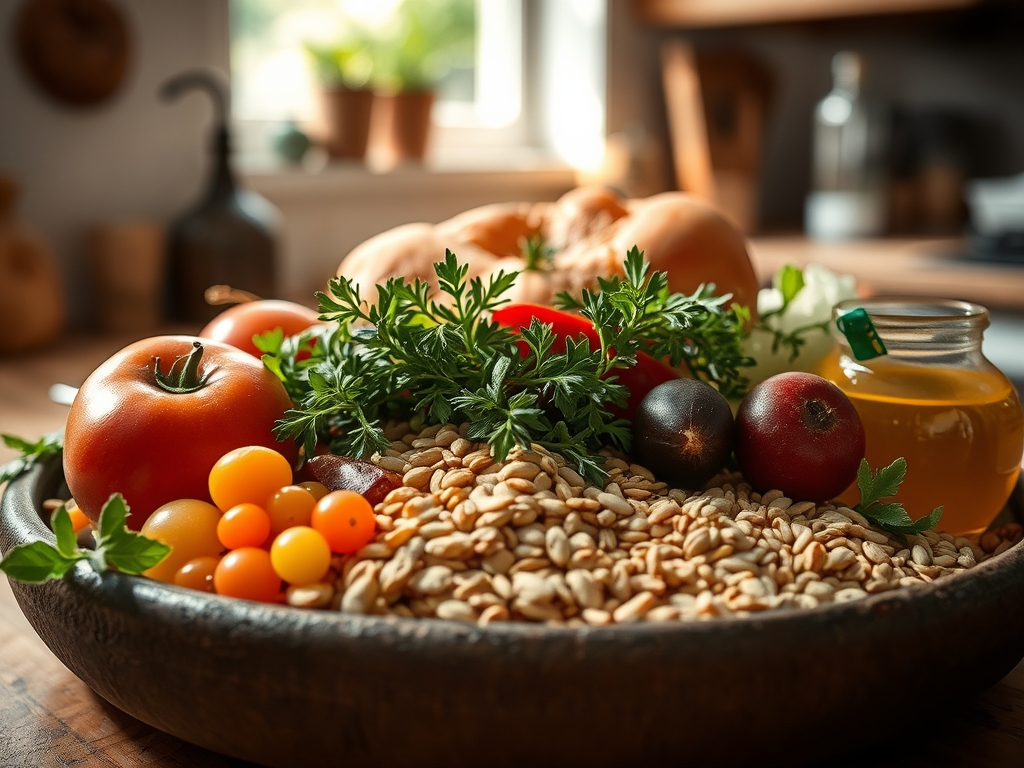
To execute these chicken recipes cheap and effectively, your mise-en-place must be precise. Start with five pounds of chicken; I recommend a mix of thighs for their high collagen content and breasts for lean volume. You will need a viscous fat source like extra virgin olive oil or clarified butter to facilitate heat transfer. For the aromatics, gather bulbs of garlic, yellow onions, and fresh ginger. These contain sulfur compounds that, when heated, break down into complex, sweet flavor molecules.
Your "Smart Substitutions" are your financial safety net. If lemons are pricey, a splash of white vinegar provides the necessary acidity to brighten the dish. Instead of fresh herbs, use dried ones but bloom them in hot oil first to release their fat-soluble volatile oils. If you lack heavy cream, a slurry of cornstarch and whole milk creates a stable emulsion that mimics the mouthfeel of a rich sauce without the overhead cost. Always keep a box of kosher salt nearby; the coarse grains allow for better tactile control when seasoning.
The Clock
Efficiency in the kitchen is governed by "Chef's Flow," which is the art of overlapping tasks to minimize downtime. For these six meals, expect a total prep time of 45 minutes and a collective active cook time of two hours if you are batch-preparing. The secret is to utilize the thermal inertia of your oven while simultaneously using your stovetop.
While the chicken roasts, use your bench scraper to clear your workspace and prep your vegetables. This parallel processing ensures that by the time the timer dings, your secondary components are ready for assembly. Remember that meat requires a rest period; allowing the chicken to sit for ten minutes after cooking allows the muscle fibers to relax and reabsorb juices. If you cut too soon, the moisture evaporates, leaving you with a dry, subpar result.
The Masterclass:
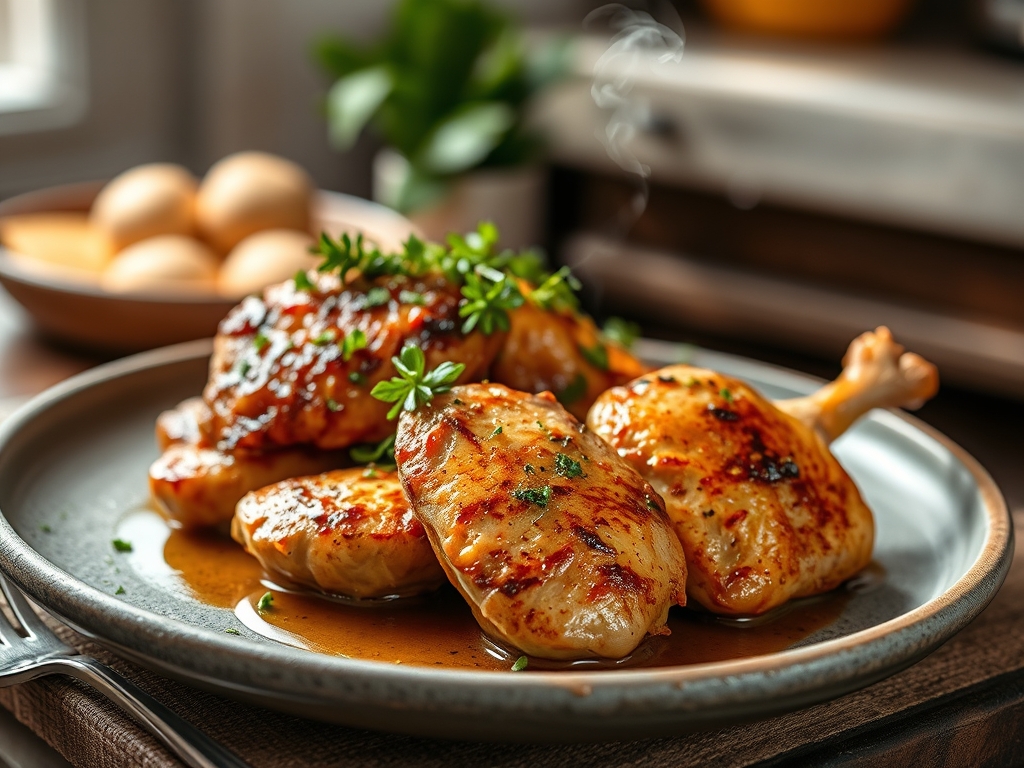
1. The High-Heat Sear
Place your chicken skin-side down in a preheated heavy-bottomed skillet. Do not move it until it releases naturally from the pan surface. This indicates that the proteins have undergone sufficient browning.
Pro Tip: This is the Maillard reaction in action. Sugars and amino acids rearrange under high heat to create hundreds of new flavor compounds. Moving the meat too early causes tearing and prevents this crust from forming.
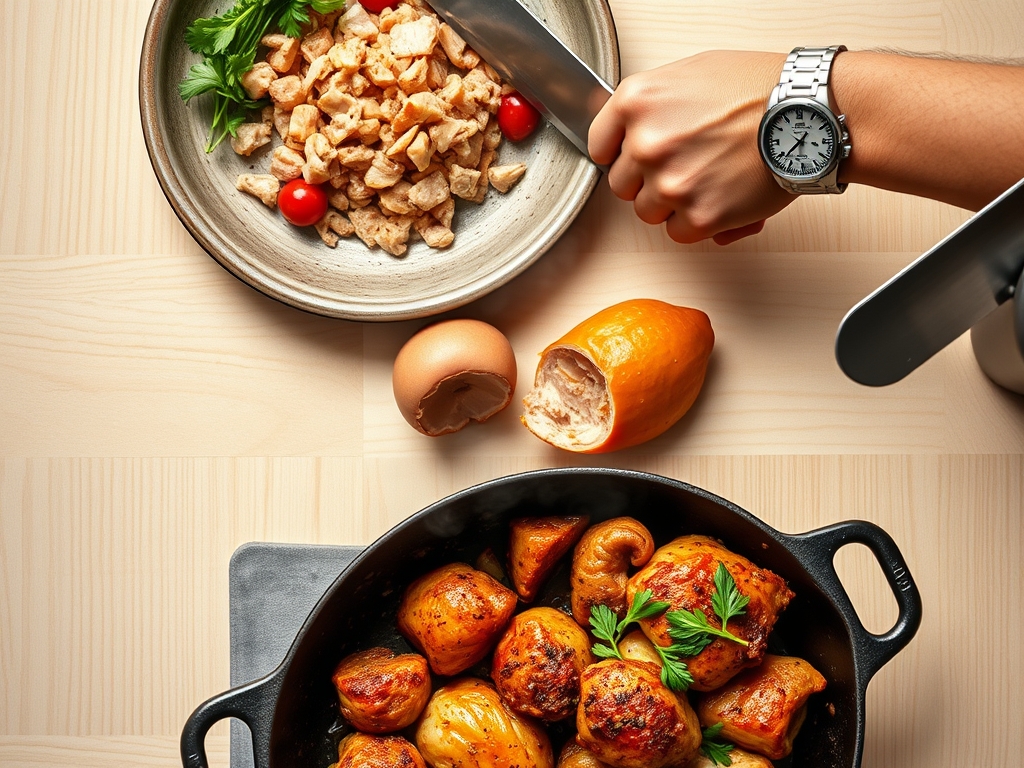
2. Deglazing the Fond
Once the chicken is removed, you will see brown bits stuck to the pan. Pour in a splash of stock or wine and use a wooden spoon to scrape them up. This creates a deeply savory base for any sauce.
Pro Tip: Those bits are called "fond." By adding liquid, you are performing a solvent extraction of the concentrated flavors that were created during the searing process.
3. The Gentle Poach
For the shredded chicken portions, submerge the meat in a flavored liquid kept just below a simmer. Use a digital thermometer to ensure the internal temperature reaches exactly 165 degrees Fahrenheit.
Pro Tip: Keeping the water below boiling prevents the muscle fibers from contracting too violently. This preserves the delicate cellular structure, resulting in a tender, moist texture rather than a rubbery one.
4. Emulsifying the Sauce
Whisk cold butter or a starch slurry into your simmering pan juices. Move the whisk rapidly to incorporate air and distribute fat globules evenly throughout the liquid.
Pro Tip: Emulsification is the process of forcing two immiscible liquids, like oil and water, to stay mixed. This creates a viscous, tongue-coating texture that carries flavor more effectively across your palate.
5. Aerating the Grains
When serving your chicken over rice or quinoa, use a fork to fluff the grains immediately after cooking. This introduces air and prevents the starches from clumping together into a dense mass.
Pro Tip: This process interrupts the retrogradation of starch. By separating the grains while they are hot, you ensure a light, airy mouthfeel that provides a textural contrast to the dense protein.
6. The Final Infusion
Finish your dishes with a "pop" of fresh acidity or a sprinkle of zest using a microplane. This should happen seconds before serving to ensure the volatile aromas reach the diner.
Pro Tip: Heat destroys delicate aromatic compounds. Adding citrus zest or fresh herbs at the very end ensures the olfactory receptors are fully engaged, which significantly enhances the perceived flavor of the dish.
The Deep Dive
From a macro nutrition perspective, chicken is a powerhouse. A standard four-ounce serving provides roughly 25 grams of high-quality protein with minimal saturated fat if you opt for skinless cuts. To make these recipes Keto-friendly, swap out the grain base for roasted cauliflower or zoodles. For a Vegan twist, the same flavor profiles can be applied to extra-firm tofu; just ensure you press the moisture out first to allow for proper searing. If you are Gluten-Free, ensure your thickeners are cornstarch or arrowroot rather than wheat flour.
"The Fix-It" section covers the most common technical failures. If your sauce breaks (oil separating), whisk in a teaspoon of warm water or a tiny bit of mustard to act as a stabilizer. If your chicken is dry, it was likely overcooked; next time, use a digital scale to ensure even portion sizes for uniform cooking. If the flavor is "flat," it almost always needs more acid, not more salt. A drop of lemon juice can act as a chemical "brightener" for the entire dish.
For meal prep, reheating is a science. Avoid the microwave if possible, as it vibrates water molecules so violently that it toughens the protein. Instead, reheat your chicken in a covered skillet with a tablespoon of water. This creates a steam chamber that gently rehydrates the meat, maintaining "day-one" quality.
The Wrap-Up
Mastering chicken recipes cheap is the ultimate culinary flex. It proves that you do not need a massive budget to eat like royalty; you just need a bit of chemistry and a lot of heart. By focusing on technique over expensive ingredients, you have unlocked a world of flavor that is both sustainable and delicious. Go forth, use your tongs with confidence, and enjoy the beautiful, sizzling results of your hard work!
The Kitchen Table
How do I keep chicken breast from getting dry?
Use a meat thermometer to pull the chicken at 160 degrees Fahrenheit. The thermal carryover will bring it to the safe 165 degree mark while it rests, keeping the internal juices trapped within the cellular walls for maximum moisture.
Can I use frozen chicken for these recipes?
Yes, but thaw it completely in the refrigerator first. Excess moisture from ice crystals will prevent the Maillard reaction, leading to gray, steamed meat instead of a golden, flavorful sear. Always pat the meat dry with paper towels before cooking.
What is the best way to store leftovers?
Place chicken in airtight glass containers within two hours of cooking. Glass is non-porous and won't absorb odors. For the best texture, store the sauce separately and combine them only during the reheating process to prevent the meat from becoming soggy.
Why does my pan sauce always turn out thin?
You likely haven't reduced the liquid enough or lacked a proper emulsifier. Let the liquid simmer until it coats the back of a spoon, then whisk in cold butter or a starch slurry to create a thick, glossy, and viscous finish.