
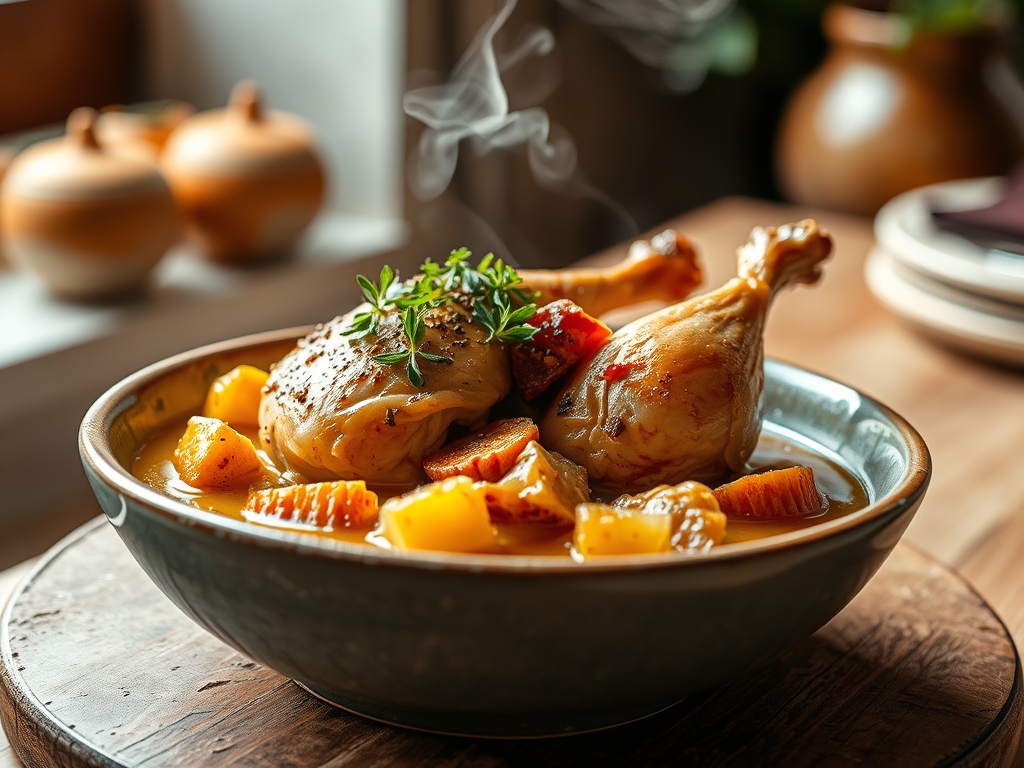
Imagine the scent of golden fat rendering and the heavy, humid vapor of aromatics filling your kitchen on a rainy Tuesday. There is a primal comfort in simmering a bird on the bone; it is the ultimate culinary hug. When you master whole chicken recipes soup, you are not just making dinner; you are conducting a symphony of collagen and mineral extraction.
The beauty of using the entire bird lies in the depth of the broth. Unlike lean breasts that dry out, a whole carcass provides the gelatin necessary for a silky, viscous mouthfeel that coats the palate. Whether you are craving a classic grandmother style noodle soup or a spicy, piquant ginger broth, starting with the whole animal ensures a nutritional density that store bought stocks simply cannot replicate. We are going to dive deep into the chemistry of the simmer, ensuring every drop of liquid is packed with flavor and every shred of meat remains succulent.
The Gathers:
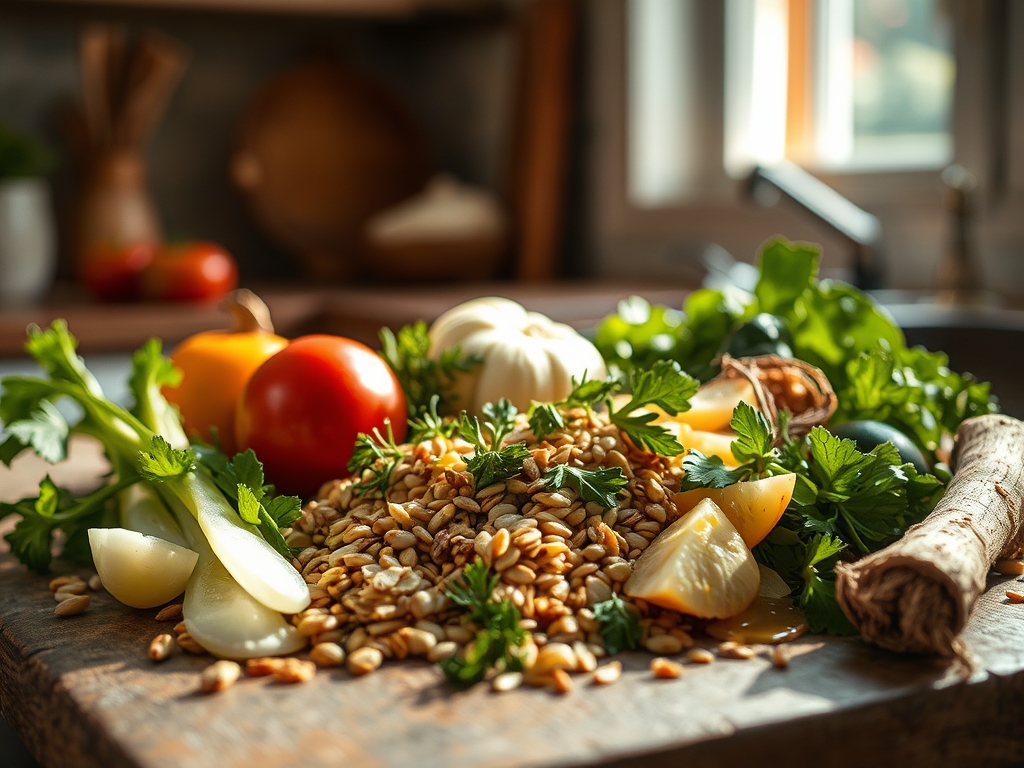
To begin your journey into whole chicken recipes soup, your mise-en-place must be precise. Start with a four to five pound organic roaster. You will need the holy trinity of aromatics: carrots, celery, and yellow onions, known technically as a mirepoix. Use a digital scale to ensure your vegetable to water ratio is balanced; aim for roughly twenty percent aromatics by weight relative to the water.
Grab your microplane for fresh ginger or garlic to maximize surface area for infusion. You will also need peppercorns, bay leaves, and a bunch of flat leaf parsley. For smart substitutions, swap parsnips for carrots if you want an earthier, sweeter profile. If you lack fresh onions, a leek provides a more delicate, buttery finish. Always keep a high quality sea salt nearby; salt is the catalyst that unlocks the protein structures during the long simmer.
The Clock:
Efficiency in the kitchen is about the Chef's Flow. Expect about twenty minutes of active prep time: washing vegetables, butchering the bird into quarters if you prefer a faster extraction, and gathering your tools. The passive cooking time is where the magic happens. A standard stovetop simmer requires ninety minutes to two hours.
If you use a pressure cooker, you can shave this down to forty five minutes, though you sacrifice some clarity in the broth due to the high pressure emulsifying the fats. The "flow" involves cleaning your station while the pot reaches a boil and prepping your secondary ingredients (like noodles or kale) during the final thirty minutes of simmering. This ensures that when the chicken is ready to be shredded, the rest of your components are standing by.
The Masterclass:
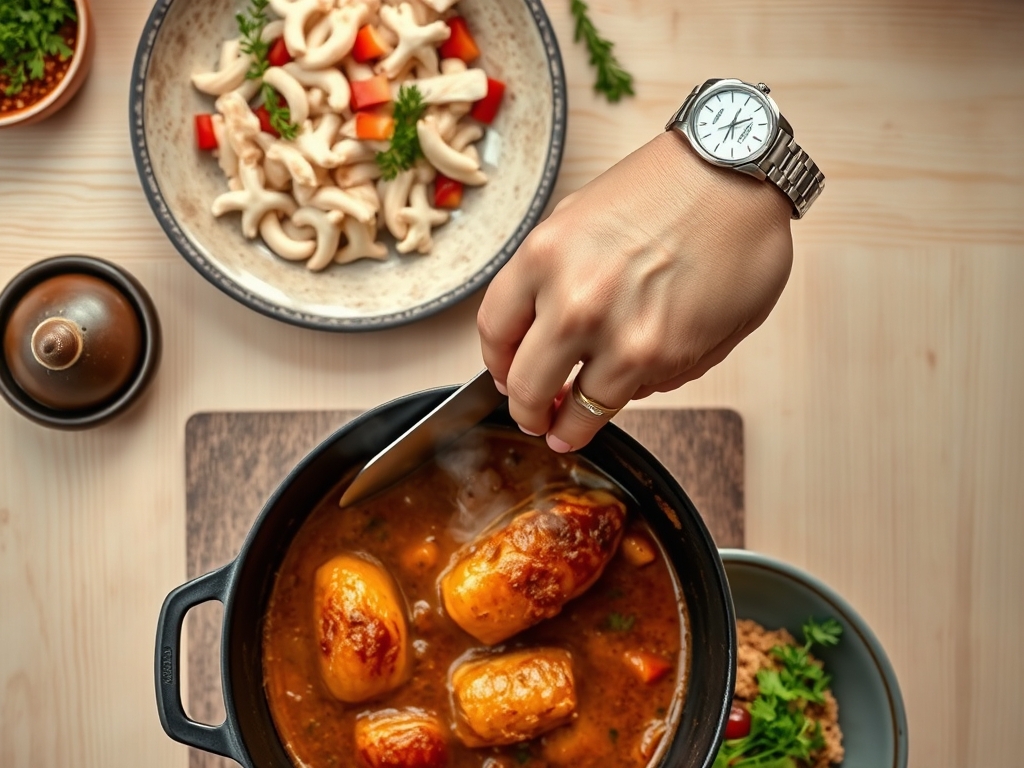
1. The Sear and Render
Place your heavy-bottomed skillet or Dutch oven over medium high heat. Use tongs to sear the chicken skin side down until the fat begins to render. You are looking for the Maillard reaction, which creates complex flavor compounds through the browning of proteins and sugars.
Pro Tip: This browning adds a deep amber hue to your broth. The science here is enzymatic browning; by caramelizing the surface first, you ensure the broth tastes toasted and nutty rather than just "boiled."
2. The Deglaze
Once the chicken is browned, remove it and add your chopped aromatics. Use a wooden spoon to scrape the brown bits, or fond, from the bottom. Pour in a splash of dry white wine or water to deglaze the pan.
Pro Tip: The fond contains concentrated flavor molecules that are soluble in liquid. Deglazing captures these molecules, ensuring no flavor is lost to the bottom of the pot.
3. The Gentle Submersion
Return the chicken to the pot and cover with cold, filtered water. Starting with cold water allows the proteins to heat slowly and stay soluble, which results in a clearer liquid. Bring it to a bare simmer, never a rolling boil.
Pro Tip: A rolling boil causes turbulent mixing, which forces fat and impurities to emulsify into the water, making the soup cloudy. A gentle simmer keeps the fat separated for easy skimming.
4. The Skimming Phase
As the pot heats, gray foam will rise to the surface. These are denatured proteins. Use a fine mesh strainer or a large spoon to remove them. This process is essential for a clean, professional finish.
Pro Tip: Removing these impurities prevents the broth from tasting "muddy." It is a mechanical separation that ensures the final profile is bright and sharp.
5. The Extraction
Simmer until the meat reaches an internal temperature of 165 degrees Fahrenheit. Use a digital thermometer to be precise. Once the meat is tender, remove the bird to a cutting board.
Pro Tip: This is the stage of collagen conversion. At sustained heat, the tough connective tissues in the legs and wings transform into gelatin, providing that rich, lip-smacking texture.
6. The Shred and Return
Use a bench scraper to move your shredded meat back into the pot after discarding the skin and bones. At this point, add your quick cooking vegetables like peas or spinach to preserve their vibrant color.
Pro Tip: This prevents thermal carryover from overcooking the delicate breast meat. By adding the meat back at the very end, you keep the texture supple rather than stringy.
The Deep Dive:
From a nutritional standpoint, whole chicken recipes soup is a powerhouse. You are consuming bioavailable amino acids like glycine and proline, which support gut health and joint repair. A standard bowl contains roughly 30 grams of protein and 15 grams of healthy fats.
For dietary swaps, Keto followers should replace noodles with zoodles or cauliflower florets. For a Vegan "chicken" soup, use a base of kombu and dried shiitake mushrooms to mimic the umami of the bird. If you are Gluten Free, ensure your thickeners are cornstarch or arrowroot rather than flour.
The "Fix-It" Guide:
- Too Salty: Add a peeled, halved potato. The starch will absorb excess sodium through osmosis.
- Too Greasy: Chill the soup overnight. The fat will solidify on top, allowing you to lift it off in one solid disk.
- Bland Flavor: Add a teaspoon of apple cider vinegar. The acid acts as a flavor brightener, cutting through the heavy fats.
For meal prep, remember that reheating can toughen meat. Use a saucier to warm the soup over low heat. Avoid the microwave if possible; the uneven agitation can break down the gelatin structure you worked so hard to build.
The Wrap-Up:
Mastering the art of the simmer transforms a simple bird into a liquid gold masterpiece. By respecting the science of the Maillard reaction and the patience of a slow extraction, you elevate a humble meal into a gourmet experience. Your kitchen is now a laboratory of flavor. Go forth, grab your favorite heavy-bottomed skillet, and start bubbling. Your future self, and your taste buds, will thank you for the effort.
The Kitchen Table:
Why is my chicken soup cloudy?
Cloudiness occurs when a soup is boiled too vigorously. This causes fats and proteins to emulsify into the liquid. To keep it clear, maintain a very gentle simmer and skim the surface frequently to remove denatured protein foam.
Can I cook the chicken from frozen?
It is safer and tastier to thaw the chicken first. Cooking from frozen prevents the Maillard reaction and results in uneven cooking. Thawing ensures the heat penetrates the bone at the same rate as the exterior meat for safety.
How long does homemade chicken soup last?
Store your soup in airtight containers in the refrigerator for up to four days. For longer storage, freeze it for up to three months. Always leave an inch of headspace in containers to allow for liquid expansion during freezing.
What is the best way to thicken my soup?
To add body without changing the flavor, temper a small amount of hot broth into a tablespoon of cornstarch. Stir this slurry back into the pot. This creates a glossy, thick texture through starch gelatinization without adding heavy fats.